Monday, March 21, 2011

Starter for the Biere de Table

Boiling the 1 L of Starter Wort
After playing with the arrangement of the magnets in the stirplate for hours, I finally found an arrangement that has been working somewhat consistently for the starter I made today for the Wyeast 3725 Biere de Garde yeast.

Aerating the Starter
I had to take two more smaller rare earth magnets from the hard drive of my old laptop and attach those to the first two rare earth magnets from my old PC hard drive. I then shortened the distance between the magnets in the stir plate and the stir bar in the erlenmeyer flask and things have been working well so far. I only have duck tape currently holding the magnets in place however, so I've been spending lots of time pushing the magnets back into place. The attraction between the magnets and the stir bar pushes them together until the magnets begin to rub against the top of the stir plate box, slowing down the rotation of the stir plate. I'll have to find that sweet spot for the magnets and mount them permanently with epoxy prior to brewing up the next starter for the soured Biere de Garde.

I brewed up this 1 L starter at about 1.040 OG and pitched the Wyeast activator package without popping the internal nutrient package. Hopefully this starter will allow me to just about double the yeast population prior to pitching them into the Biere de Table I'll be brewing in the next few days. I was surprised to find that even with a relatively low OG Biere de Table (about 1.043 OG) I still needed additional yeast cells to ferment the beer cleanly. So it seems that using starters to ferment will help me produce better beer in the future, especially with high gravity brews. Hopefully together with the new oxygen system I picked up to add pure oxygen to the wort prior to pitching yeast, these starters will provide large populations of very healthy yeast, resulting in great beer.


Thursday, March 17, 2011

Finishing the Stir Plate

I ordered a 2000 mL flask and stir bar the other day from Northern Brewer so I was finally able to figure out how to set the magnets I salvaged from an old CPU on the computer fan. 

I separated the two rare earth magnets from the metal forms that held them in the computer hard drive and stacked them on top of each other to improve the attraction towards the stir bar. After playing around with different arrangements, I chose to set the magnets on a metal washer that will eventually be glued to the computer fan. With this setup, I can adjust where the magnets sit on the metal washer, allowing me to adjust them if I ever have trouble finding a consistent spin of the stir bar in the future.

I had to pick up another piece of equipment from Radio Shack after realizing that my original 5 V cell phone charger wasn't a sufficient power source to power the stir plate. I purchased a AC to DC power source that has an adjustable voltage which should prove useful when adjusting to find the right amount of power to spin the stir bar. 


Unfortunately, the 2000 mL flask was not such a great purchase as it has a slightly domed bottom to the flask. Every time I've tried to start the stir bar, the stir bar is thrown very quickly towards the sides of the flask. I think I may end up using my french press coffee flask in the meantime instead as it has a relatively flat bottom and was able to maintain the stir bar's spin for the few hours I tested it. Since the next brew is a low ABV Biere de Garde version of a table beer, I won't need a starter until the following brews. I'm hoping I can find a decent flask in time for making starters for the soured Biere de Garde and American IPA (Bell's Two Hearted IPA clone) I have planned.

Filtering the Kolsch
Both the German Altbier and the English Oatmeal Stout kicked within a couple of days of each other this week, and both were quickly replaced by the English Pale Ale with American hops and the German Kolsch. Both beers have been filtered and should be carbonated by next week. The Scottish 60 Schilling Ale and Barleywine continue to age in carboys, and the Scottish Wee Heavy is just about finished with fermentation.

Slainte Mhaith

Wednesday, March 9, 2011

# 9 Scottish Wee Heavy

In anticipation of drinking beer next fall, I thought spring would be the right time to brew at least one big beer that I would plan on laying down throughout the summer to age. So after brewing a low gravity Scottish 60, I thought the Scottish 1728 ale yeast would make for a great  high gravity Scottish Wee Heavy.


Scottish Wee Heavy


Batch Volume (Gal): 6.00
Pre-Boil Volume (Gal): 7.5


Total Grain (Lbs): 18.63
OG: 1.088   Anticipated FG: ~1.020   Anticipated ABV: ~9.0%


IBUs: 29.4
SRM: 19.4
Brewhouse Efficiency: 76%
Boil Duration: 105 min


Grain                                                (Lbs/oz.)    (%)
British 2-row Pale Malt (Pearl)          15.5         83.2
Crystal 40                                               1            5.4
CaraAroma                                          8 oz.         2.7
Crystal 120                                           8 oz.        2.7
Honey Malt                                          8 oz.        2.7
Munich Malt                                        8 oz.        2.7
Chocolate Malt                                    2 oz.        0.7


Hops                         (AA%)   (IBU)     (Oz.)    (Boil[min])
Northern Brewer     10.6       21.9         0.6            60
Northern Brewer     10.6       7.5           0.4            30


Yeast
Wyeast 1728 Scottish Ale (repitched 200 mL of yeast slurry 
from 60 Schilling)


Water
2 tsp 5.2 pH stabilizer (in mash)
3/4 tsp Calcium Chloride (105 min)
1/2 tsp Calcium Sulfate (105 min)
1 Whirlfloc tablet (10 min)
1/2 tsp yeast nutrient (10 min)


I mashed this beer at 1.5 qts/lb and aimed to hit anywhere from 158 F to 155 F for a 60 minute mash. I have been having trouble reaching my targeted mash temperature with the larger mashtun, so I set my aim a little higher than normal. I ended up hitting the upper end of that mash range at 158 F for about 15 minutes and slowly brought the mash down to 155 F for the remaining 45 minutes with stirring. Hopefully that high initial temperature won't result in a beer that is too dextrinous. The high gravity and large grain bill should create a fairly sweet beer alone, so such a high mash temp may result in a cloying beer. But I think either way, the alcohol should provide some sort of balance if the beer should finish at a high final gravity.

Letting the mash cool from 158 F to 155 F
I've started to notice a consistently salty flavor in my beers, so I've been trying to limit both the amount of 5.2 pH stabilizer that I use in the mash, as well as the amount of calcium chloride I add during the boil. I've heard that 5.2 can contribute a lot of sodium to the beer, leaving it salty, although the container claims that 5.2 adds nothing to the flavor of the final beer. Calcium chloride is the more likely culprit however. Tasting a grain of calcium chloride is one of the most intensely salty tastes I've ever experienced, so it's likely that I'm adding too much chloride to my beer, possibly in addition to the chlorides that already exist in my brewing water. I'll have to get a water test done so I can finally begin to understand the salts my brewing water needs in order to achieve the regional water profiles of the beer styles I brew.

Sparging the grains to remove the sugar
The brewday was smooth and uneventful other than the point at which I spilled a fair amount of my grain all over the floor. I'll have to build a better base for my grain mill; the one that the mill came with doesn't offer much stability. 

Part of me wishes I that I brewed the Wee Heavy from the first runnings of the mash and followed it up with a Scottish 60 from the second runnings. If I had been able to make a starter, that would have worked out great as I left a good amount of sugar in the mashtun after collecting all that I needed for the Wee Heavy. I'm running out of containers to condition my beer in though, so it's probably for the best that I give the parti-gyle brewing a rest for a while.

Having a pint of Alt during the boil
This beer should ferment at around 60-62 F for at least the next two weeks. The low fermentation temperatures should enhance the malt profile of this beer while reducing esters, as was the case with the Scottish 60 Schilling. After fermentation, I hope to condition this beer for a long time in the carboy at the coldest temperatures I can achieve. Then I'll bottle the beer and let it condition until next fall. As this beer should be strongly sweet, alcoholic, and malty, I'm expecting that I'll be able to keep my hands off it throughout a hot, humid summer; long enough so that there's still plenty to enjoy when the weather's right for such a big beer.

I plan on brewing a few Biere de Gardes in the upcoming weeks, after some more space opens up in the kegs/carboys. I'll start off with a Biere De Table which should be a great low ABV beer for the spring and then follow it up with a soured Biere De Garde. The kegs in the kegerator containing the German Altbier and the English Oatmeal Stout are starting to get lighter, so the English Pale Ale and the German Kolsch should take their places relatively soon.

Monday, February 21, 2011

#8 Scottish 60 Schilling Ale

Now that I have plenty of beers ready for the kegerator and a few beers in bottles, I figured I could begin to space out brews a bit more and brew beers that allow for long aging periods. Also, I thought that I should take advantage of the low fermentations I can achieve at this time of year. I chose to go with a few Scottish ales that would benefit from a long cellaring period, as well as the low fermentation temperatures I will not likely achieve after a few more months.

I chose to go with Wyeast's Scottish Ale 1728 ale yeast, and brew up a low alcohol Scottish 60 Schilling ale followed by a Scottish Wee Heavy. The Scottish 60 should be a great way to grow some yeast for the "bigger" beer that will follow it since the OG of a 60 is relatively low, allowing the yeast to propagate without too much stress on the yeast. Plus, a low abv session beer will be great this spring, even if the finished beer ends up on the maltier side.

Scottish 60 Schilling Ale

Batch Volume (Gal): 6.00
Pre-Boil Volume (Gal): 5.00 (Collected 5 gallons of runoff, 
     then topped up to 6 gallons post-boil)

Total Grain (Lbs): 7.13
OG: 1.039     Anticipated FG: ~1.012     Anticipated ABV: ~3.5%

IBUs: 13.9
SRM: 14.6
Brewhouse Efficiency: 91%
Boil Duration: 90 min

Grain                                              (Lbs/oz.)       (%)
British 2-row Pale Malt (Pearl)         4.5            63.2
Munich Malt                                      8 oz.             7
Honey Malt                                        8 oz.             7
Crystal 40                                              1               14
Crystal 120                                         8 oz.             7
Chocolate Malt                                  2 oz.            1.8

Hops                           (AA%)     (IBU)     (Oz.)      (Boil[min])
East Kent Goldings     4.5          13.9       0.75              60

Yeast
Wyeast 1728 Scottish Ale (pitched directly from liquid yeast packet)

Water
1 tsp 5.2 pH stabilizer (in mash)
1 tsp Calcium Chloride (90 min)
1/2 tsp Calcium Sulfate (90 min)
1 Whirlfloc tablet (10 min)
1/2 tsp yeast nutrient (10 min)

I chose to mash this beer at a little bit thinner at 1.5 qts/lb, and went with a high mash temperature of 158 F to allow for a high percentage of dextrins in the finished wort. I only hit about 155 F for the first ten minutes, but I brought up the mash to 158 F for the remaining fifty minutes. Hopefully the high mash temperature, high percentage of specialty malts in the grain bill, and low fermentation temperature (~62 F) will result in a very malt driven beer, especially for such a low alcohol, quaffable beer.

After a good mash and sparge period, I was a little concerned upon smelling the wort once it was in the boil kettle. I was a bit worried that my mash tun had left an odor in the mash. After brewing the barleywine and english pale ale two weeks ago, I had left the grain in both mash tuns overnight. I was so tired after brewing all day, I figured there was no need to drag all that spent grain out to the compost, and I could simply do it the next day. Unfortunately the bacteria that are found in the husks of barley malt soured both mashes overnight, leaving me with a strongly soured wort and two very smelly mashes and mashtuns. 

Vorlaufing: recirculating the mash prior to collecting the wort in the boil kettle
I think I successfully removed the stink from the larger of the two mashtuns, but used the smaller mashtun today. After collecting the wort during runoff and while boiling, the aroma coming from the wort was very banana like, with some subtle sourness to it. I'm concerned that the finished beer could potentially be either soured (from a population of bacteria still alive in the mashtun) or simply retain the aromas taken from the smelly mashtun. Hopefully neither situation occurs, and the boil was enough to "scrub out" any off aromas and/or flavors.

I'm also concerned about my supposed efficiency. I've never even approached 91% efficiency before, so it was a bit confusing when I first measured my original gravity. I have observed some greater efficiency due to the use of my new mill, and I did use a thinner mash which has been said to increase mash efficiency, but 91% seems to defy explanation. I ran-off the first part of the mash relatively quickly so that may have withdrawn a large proportion of the sugar in solution. The small mash may have contributed to an increased ability to withdraw sugar as well. I have little experience using my new grain mill together with thin mashes so I'll have to go through a couple more brew days like this before I can try and explain where this increased efficiency is coming from.

The IBUs in this brew are a bit questionable as well, as my flame on the burner went out mid-boil. This was after I had made my 60 minute bittering hop addition, so it likely contributed to a decrease in alpha acid isomerization and therefore decreased bitterness in the final beer. I simply ran the boil fifteen minutes longer, and after playing with the numbers, I figured that this would either put my IBUs on the low or the high end of the IBU style range for 60 Schilling Ales (10-15 IBUs). It shouldn't amount to any big issue in the final beer.


The 60 Schilling ale should ferment at around 62 F for at least the next week, possibly two weeks. I'm hoping to brew the Scottish Wee Heavy some time before leaving to see my girlfriend Laura in Bahrain (I hear the country's settling down a bit...). I'm thinking the 60 will be great for warmer spring weather after it's in the keg, and the Wee Heavy will be a great fall beer if I can keep it around long enough in bottles.

The kegerator is full once again with two kegs; the German Altbier and the English Oatmeal Stout. The Alt is very malt, yet sessionable, with great flavor and aroma coming from the German Hallertau Mittelfruh hops. The Oatmeal Stout is smooth and creamy from the use of oatmeal, but with a nice contrast coming from the mineral flavor from the London ale yeast and the roast from the roasted barley. The kegged beers will hopefully be joined soon by the Belgian Dubbel once it fully carbonates in bombers.

English Oatmeal Stout
German Altbier

Tuesday, February 15, 2011

Filtering the German Altbier

After two weeks of fermentation at 60 F and two weeks of lagering at about 55 F I got to filtering the German Alt I brewed in January. I decided to put it on tap a little bit earlier than I had previously planned since I'm looking for another beer to put on tap along with the English Oatmeal Stout that'll be on tap soon. I'll have plenty of beers ready to go on tap after the Alt's finished, and I figured a month should be enough age on a beer like this. Plus, additional maturation will occur once the beer's in the kegerator.

Alt flowing through the filter cartridge
I knew I'd have to filter this beer, since even with a long lagering period, the Wyeast 2565 Kolsch yeast is a poor floculator. I cold crashed the beer last night at around 38 F to help some of the yeast fall to the bottom of the keg, helping the filtration process. All that was needed was one pass through the coarse filter and the beer came out crystal clear on the other end. There doesn't seem to be a lot of protein haze or any other haze to the beer, so I'm thinking my process of chilling the beer to 60 F after the boil (rather than just around 70  F) and using a larger amount of irish moss could be helping to produce clearer beers.

The filtered Alt flowing into the right keg
Although the beer was not yet carbonated and a bit too cold, the first taste was fantastic; super malty with a great clean taste and finish. Once it's all carbonated, it should be a great malty brown ale.

The Belgian Dubbel should be ready this weekend as well. I've already gone through about a gallon's worth of the beer in bottles, trying 12 oz. bottles of the dubbel every few days to check how carbonation is proceeding. The Oatmeal Stout will be cold crashed and force carbonated this weekend as well, possibly after only coarse filtration as with the Alt. 

The English Pale and the "laurabelle" English Barleywine are now both roughly a week and a half old. The English Pale has been finished for a while, but I had to leave it on the yeast to allow the beer to clean up after a very fast fermentation. I should have a free keg to put it in by the weekend too, after the Oatmeal Stout has been filtered. The English Barleywine is slowly, slowly still chugging along, although visual signals of fermentation are almost all but gone. With past high gravity brews, I would have likely concluded that the beer had finished by now, and even bottled the beer, resulting in "gushers" or exploding bottles. Now that I know better, I'll be transferring the beer into a secondary carboy to finish a long conditioning period of anywhere from 1 to 2 months before bottling and allowing for years of bottle conditioning.

Monday, February 7, 2011

#6 laurabelle English Barleywine / #7 English Pale Ale

I've wanted to brew a barleywine ever since having my first at Barley's Brewing Co. with my girlfriend Laura. The highest gravity beer I had ever brewed however, until last saturday, was a 7.5 % ABV Russian Imperial Stout. It was a RIS that wasn't quite what you'd call "Imperial" in the craft beer sense of the word, but I have felt somewhat ready to brew my first beer over 8% (actually quite a bit over 8%) with the equipment I now have and where I feel my brewing knowledge is currently.

What could be more attractive to a beer geek than a woman who loves barleywine? It's been great having a girlfriend who shares my love of craft beer, and with respect to certain styles,  she has a love that exceeds mine. Since Laura is abroad working as a Fulbright Scholar in Bahrain, I figured a birthday gift that would still be around by the time she got back made a lot of sense. This beer should be around much longer than the next four months, and should with good bottling, not only last until Laura's next birthday but even years beyond.

Brewing a barleywine provided many interesting concerns due to the amount of sugar necessary to reach the high level of alcohol (usually about 9.5 % - 12%+). I knew I wanted Laura's beer to be all malt, and to avoid simple sugars which would produce a drier finished beer. I also like the idea of an all malt barleywine, preferably with the majority of the sugars coming from an all-grain mash, as opposed to the use of malt extracts. With lots of research and cross-referencing recipes and techniques, I was able to find a process that seemed the most likely to produce the beer I was hoping to create.

Using information from the "High Gravity" episodes from Brew Strong as well as a few barleywine recipes from the brewing magazine Zymurgy, I settled on brewing a barleywine in the traditional English brewing Parti-gyle mash technique. Parti-gyle mashing was utilized in order to produce three separate beers during one brewing session; the first runnings of wort from the grains produced the aging beer, typically a barleywine or old ale, the second runnings produced a table beer, usually a pale ale, mild, or bitter, and the third runnings from the mash produced small beer, for the kids and for daily drinking without becoming intoxicated. Although I didn't see the point in producing a small beer, the thought of producing an English Pale Ale from the second runnings of a large mash seemed interesting.

In order to mash three times the normal amount of grain I typically use in my beer recipes, I had to use both my 5 gallon and my 10 gallon mash tuns. Luckily, the 1.5 quarts per pound of strike water added to the 28.5 pounds of grain produced a total mash volume that was just small enough to fit in the two mash tuns. I knew I needed to collect a large amount of runoff from both mashes, and so I chose to go with 1.5 qts/lb as opposed to the 1.25 qts/lb that I usually mash with. At 1.5 qts/lb, it was expected that I could collect at least 7.3 gallons of runoff (with some water lost to grain absorption) at close to the optimal gravity for first runnings (1.080 - 1.082). After reading other homebrewer's accounts of Parti-gyle mashing, I also expected to have an efficiency close to 53% for the first runnings, an efficiency that would give me my targeted original gravity as well.

One of the benefits of the new grain mill is that I can now buy base malt in bulk. Since I needed half of a 55 pound bag of British base malt for the grain bill of the barleywine I chose to buy a bag from my local homebrew store. Rather than paying $ 2 per pound, I pay $ 1.25 per pound by buying in bulk, and the rest of the British base malt will be great in a Scottish 60 schilling ale and a Scottish wee heavy.

55 pounds of British Pale 2-row next to the 1.5 pounds of specialty malt
I chose to produce a relatively straightforward english barleywine that relied primarily on the flavors produced by the base malt, as opposed to loading the recipe with specialty malts that can often result in a cloyingly sweet beer. Hopefully with a little CaraMunich 45 for caramel sweetness, maltiness, and color and Crystal 120 for darker coloring and dried fruit/brown sugar flavors, this beer will finish with some interesting complexity. The majority of the flavors however will be derived from the British 2-row Pale base malt together with the long boil. With a long boil of a relatively light colored beer, a large portion of the color and caramel flavor produced is often the result of melanoidin formation via Maillard reactions, and in the case of the barleywine, will likely be a major contributor to the final beer's flavor and color. 

With a relatively low level of bittering, consistent with the English tradition for barleywines, I hope that the malt profile of the finished beer with be more at the forefront. Although Laura and I both love hoppy beers, I think we both tend to prefer the maltier style of an English barleywine to the hoppier American barleywine.


laurabelle     English Barleywine

Batch Volume (Gal): 5.00
Pre-Boil Volume (Gal): 7.5 (1.078, first runnings only)

Total Grain (Lbs): 28.5
OG: 1.117   Anticipated FG: ~1.032 - 1.025   
Anticipated ABV: ~11.5% - 12.0%

IBUs: 65.7
SRM: 17.5
Brewhouse Efficiency: 55%
Boil Duration: 120 min

Grain                                                     (Lbs/oz.)       (%)
British 2-row Pale Malt (Pearl)                27             94.7
CaraMunich 45                                       12 oz.           2.6
Crystal 120                                               12 oz.           2.6

Hops                            (AA%)    (IBU)   (Oz.)      (Boil[min])
Northern Brewer        10.6         25.7        0.6              90
Fuggle                          4.0          6.6        0.45             60
Northern Brewer        10.6          9.7        0.25             60
Fuggle                          4.0           7.2       0.55              45
Northern Brewer        10.6           9.9       0.5               30
Northern Brewer        10.6           2.6      0.25              15
East Kent Goldings     4.5             1.4       0.5                5
Northern Brewer        10.6           2.6       0.4                5
East Kent Goldings     4.5              0         0.4               0
Northern Brewer        10.6            0        0.45               0

Yeast
Wyeast 1028 London Ale (repitched 200 mL of 
yeast slurry from oatmeal stout)

Water
1 tsp 5.2 pH stabilizer (5 gallon small mash)
2 tsp 5.2 pH stabilizer (10 gallon large mash)
1 tsp Calcium Chloride (120 min)
1/2 tsp Calcium Sulfate (120 min)
1 tsp Irish Moss (10 min)
1/2 yeast nutrient (10 min)

First runnings

I had to stagger the mashes, in order to mash into one mashtun while heating strike water for another. After preheating the 10 gallon cooler, I mashed in 19.5 lbs of the base pale malt and the specialty malt. Unfortunately I think I'll have to work on preheating the 10 gallon mashtun more effectively (I had only previously used it as a mashtun with the oatmeal stout). I had aimed for a mash temperature of 150 F for 90 minutes for both mashes but only hit 145 F at the start of the 10 gallon mash, the lower extreme of the saccharification rest (145 F - 160 F). Since it's a larger container, I think it may lose more heat than the 5 gallon cooler when I mash in, so I'll have to work on that in the future. 

Preheating the 10 gallon cooler
The low mash temperature created a very fermentable wort that will dry out easily; however, such a low mash temperature favors the activity of beta amylase and not alpha amylase. Beta amylase likely converted all the starch to sugar that it was capable of converting, but the relatively low activity alpha amylase exhibited at 145 F seemingly left a lot of unconverted starch in the first mash, startch that it would have converted had it not been for such a low mash temperature (the runoff from this mash was cloudy). 

The grain for the 10 gallon mash and homemade mash paddle
In order to compensate for the first mash, I mashed the smaller 5 gallon mash much higher, aiming for about 155 F but hit 160 F for 60 minutes. The 10 gallon mash will make up 2/3 of the final beer and the 5 gallon mash will make up the remaining 1/3, so hopefully the extremely low and the extremely high mash temperatures will create a beer somewhere close in flavor and body to a beer entirely mashed at 150 F.

After mashing the 10 gallon mash for 90 minutes and the 5 gallon mash for 60 minutes, I recirculated each mash quickly and collected a total of 7.5 gallons of first runnings at a gravity of 1.078, with only a small amount of wort left in the 5 gallon mash that I later ranoff and used in the english pale ale. Once boiled down to 5 gallons, my original gravity was 3 points greater than what I had originally aimed for, which was a great relief as my biggest concern on brewday was that I wouldn't come close to my 1.114 targeted original gravity.

Collecting runoff and measuring the original gravity
After a two hour boil, with hops added often and in small portions (in order to produce a more subtle melding of hop flavors from the three British varieties of hops), I chilled the beer to 70 F. I chose to aerate the beer using my aquarium pump for a bit longer than I typically do, about 45 minutes, in order to dissolve as much oxygen as possible into the wort. Such a high gravity wort tends to be resistant to oxygen absorption, and the yeast needed a large portion of dissolved oxygen in order to undergo a healthy fermentation.

I had chilled the oatmeal stout the night before in an attempt to cold crash as much yeast out of the beer as possible, leaving it on the bottom of the fermenter to repitch into the barleywine. Using the yeast pitching calculator on MrMalty.com, I repitched 200 mL of yeast slurry, rather than pitching the entire yeast cake as I have with previous batches fermented with repitched yeast. Hopefully it's enough to ferment such a big beer, and I won't regret just pouring the beer onto the old yeast cake.

Transferring the oatmeal stout into the keg and off of the yeast cake
About 20 minutes after pitching the yeast, the two mashes separated with the less dense, cloudy first mash on top, and the second denser, clear mash on the bottom. The activity of the yeast about an hour after pitching however quickly mixed the two back together.


Second runnings

After finishing the barleywine, I remashed into both the 5 and 10 gallon mashes with the same amount of water I used to mash in earlier in the day. I added near boiling water to both mashes to bring the tempeartures of both mashes up to 170 F (the optimal temperature to dissolve and remove sugar from the grains without extracting tannins). Both mashes stood for 10 minutes in order to allow the sugar to dissolve, and then I ranoff both mashes into the boil kettle. I only chose to collect about 6.5 gallons so as not to necessitate a boil as long as needed to boil all of the excess water as with the barleywine. Instead I collected an original gravity of about 1.047 and added a pound of extra light British dry malt extract that I had on hand in case I didn't hit my targeted gravity in the barleywine. With the extra pound of DME, I had an original gravity of 1.055 in five gallons. I chose Columbus (one of my favorite all-purpose hops) for a high alpha-acid bittering hop and Sterling for flavor and aroma. 


English Pale ale

Batch Volume (Gal): 6.00
Pre-Boil Volume (Gal): 6.5 (second runnings from batch sparge)

Total Grain (Lbs): 29.5
OG: 1.046     Anticipated FG: ~1.012      Anticipated ABV: ~4.5%

IBUs: 42.7
SRM: 17.6
Brewhouse Efficiency: 22%
Boil Duration: 65 min

Grain                                                       (Lbs/oz.)         (%)


British 2-row Pale Malt (Pearl)         27               94.7
CaraMunich 45                                    12 oz.             2.6
Crystal 120                                            12 oz.             2.6
Muntons Extra Light DME                   1                  3.4

Hops            (AA%)     (IBU)     (Oz.)     (Boil[min])
Columbus     14.0         33.7        0.5             60
Sterling          6.0          7.4          0.5             30
Columbus     14.0         9.0          0.5             15
Sterling          6.0           0            0.5              0

Yeast
Wyeast 1028 London Ale (repitched ~100 mL of 
yeast slurry from oatmeal stout)

Water
3 tsp 5.2 pH stabilizer in the original mashes
1 tsp Calcium Chloride (65 min)
1 tsp Calcium Sulfate (65 min)
1 tsp Irish Moss (5 min)
1/2 tsp yeast nutrient (5 min)

I was super tired by the time I boiled the pale ale, and made a few mistakes with the hop additions, and the propane tank started to run out halfway through the boil. I didn't get enough water to boil off and so ended up with 6 gallons of finished beer. I was so ready to be done with the day that I simply transfered the beer from the boil kettle straight into the fermenter that I had transfered the oatmeal stout from earlier. I poured the beer directly onto what remained of the yeast cake, which I think was about 100 mL. I think in retrospect I should have measured the amount of yeast I pitched into the pale ale, since it fermented out in about 2 days after a really vigorous fermentation. Hopefully the huge pitch of yeast in the beer doesn't leave it flavorless and water-like.

After brewing a bunch of beers since the beginning of January, I'm planning on taking a bit of a break before getting back into it with some Scottish ales and then some Biere de Garde Belgian ales. The keg of Belgian Pale Ale kicked yesterday, and so the only homebrew remaining is Buster's Bitter in bottles. The Belgian dubbel is almost ready in bottles, the oatmeal stout should be ready for the kegerator in two weeks, and the English pale ale in three weeks. The Alt and the Kolsch I'll try and leave for at least the next month to lager in the basement. The barleywine should go through a very long fermentation and conditioning period; at least a two week fermentation followed by a month long at minimum (but possibly as long as 2-6 months) conditioning period before bottling. It's a good thing I'll have to wait for the barleywine to condition; without the temptation to sample, I know I'll be able to wait and have the first bottle with Laura some night this summer.

Wednesday, February 2, 2011

Bottled Belgian Dubbel

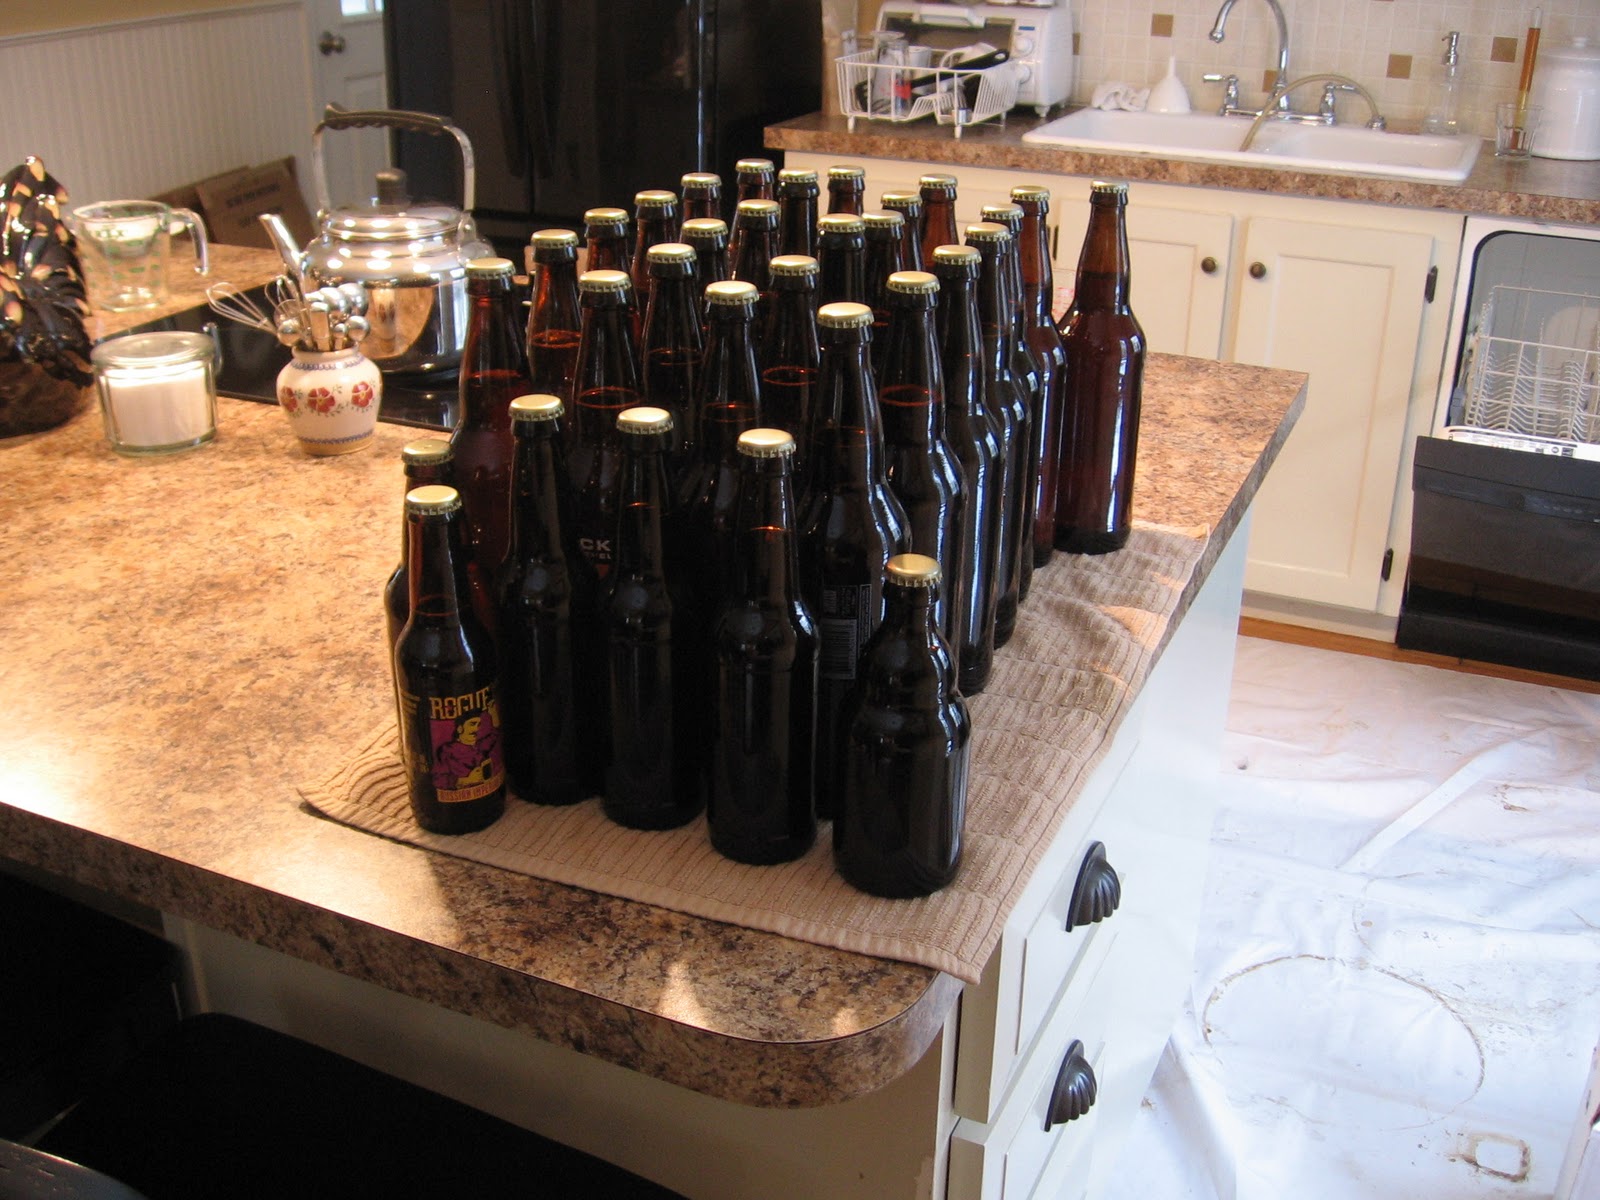
Just got around to bottling the Belgian Dubbel I brewed 2 and a half weeks ago. I was able to bottle much more than the expected 25 bombers, which was a welcomed surprise. Seems like I was able to limit the amount of beer I left in each container after each of the two times I siphoned. I primed with 3.5 oz. of cane sugar, which should give me a level of carbonation anywhere between 2.0 to 2.5 volumes of CO2. I bottled 25 22 oz. bombers and six 12 oz. bottles. The small 12 oz. bottles should give a pretty good indication of how the 22 oz. bombers are carbonating, so they'll be the first I'll try in order to avoid opening an uncarbed 22 oz. bottle.


With the remaining beer I was able to measure the FG. I hit my anticipated FG of 1.012 exactly, putting the Dubbel at 6.9% ABV. It's got to be a good sign of a healthy fermentation that the yeast was able to ferment the final beer to the expected final gravity. A small taste of the beer revealed no off flavors as well, just the typical flavors of banana, clove, a little cinnamon, some medicinal flavors from phenols, but mostly a strong malt backbone that is the primary character sought in Belgian Dubbles. In two weeks after carbonation has hopefully finished, I think this beer will make a nice end of winter beer.

The Belgian Pale Ale is almost gone from the keg, unfortunately just about the same time it began to mature (I have a problem of drinking beers too young!). The German ales, the Kolsch and the Alt, are both wrapping up fermentation with the Alt beginning conditioning at 55 F and the Kolsch on week two of fermentation at 60 F. The English Oatmeal Stout has finished fermentation for the most part, with very little CO2 coming through the blow off tube. The stout should be ready to be transferred to the keg once I'm ready to use the yeast for the next high gravity brew.