Wednesday, November 2, 2011

#24 Buster's Bitter (Batch No.2) / Bottling the Belgian Tripel / Baking "Mashed" Bread

The Scottish Wee Heavy
For what will most likely be my last brew with this particular pitch of Wyeast of 1968 London ESB ale yeast, I wanted to brew another batch of a beer I brewed last fall in honor of my grandfather. The beer last year was brewed with the 1968 strain and came out great, so I wanted another chance to brew this beer with a few tweaks.

The malt bill for this beer was formulated to a certain extent out of necessity. I'm planning on making a move soon, and I'm not sure I'll have the chance to brew all-grain batches once I move. There's a fair amount of base grain and a few specialty grains I am looking to use up, so the base came from the remainder of a bag of British 2-row, some American 2-row, and some Carastan malt (aka British Crystal). I liked the influence of American Special Roast Malt so much in the Ordinary Bitter that I chose to put a small amount in this grain bill too. The Carastan, American Special Roast, and Crystal 120 are substitutes for Aromatic Malt, and Crystal 60 that I used in the previous batch. I chose to use the same hops but with a different hopping schedule; I chose not to "pepper" in hops as I had with the previous brew, but keep Northern Brewer as a bitter/flavor hop and let the EKG and Fuggles do all the aroma and dry hopping. The first batch of Buster's Bitter finished with a gravity that was a bit too low for my taste, so I chose to lower the mash temp as well this time around.

Buster's Bitter (Batch No.2)

Batch Volume (Gal): 6.0
Pre-Boil Volume (Gal): 7.0

Total Grain (Lbs): 14.5
OG: 1.065   Anticipated FG: ~1.012   Anticipated ABV: ~7% ABV

IBUs: 46
SRM: 11.3
Brewhouse Efficiency: 74%
Boil Duration: 95 min

Grain                                                  (Lbs/oz.) (%)
Malteurop North American 2-row        7       48.3
Pearl British 2-row                                  5       34.5
Carastan Malt                                           1        6.9
Wheat Malt                                             8 oz.    3.4
Victory Malt                                            8 oz.    3.4
Crystal 120                                              4 oz.    1.7
American Special Roast                         4 oz.    1.7

Hops                      (AA%) (IBU) (Oz.) (Boil[min])
Northern Brewer  12.3      41.3    0.8        90
Northern Brewer  12.3       4.8     0.2        30
EKG                         4.5          0      0.5         0
Fuggles                    4.0          0     0.5          0
EKG                         4.5          0      0.5    Dry Hop
Fuggles                   4.0          0      0.5     Dry Hop

Yeast
Repitched ~115 mL of thick, moderately clean 1968 London ESB yeast slurry from Black Butte Porter yeast cake

Water
Ca: 100 Mg: 2 SO4: 134 Na: 25 Cl: 81 HCO3: 84
Mash Schedule
Single Infusion   5 min 140 F, brought up to 150 F 10 min, brought up to 152 F at 15 min, 
15 min mashout at 165 F 
In Mash: 3 mL of Lactic Acid; pH ~5.4
In Boil: 2 g NaHCO3, 6 g CaSO4, 4 g CaCl2

Transferring the Porter off of the 1968 yeast cake
Only two issues on this particular brew day; my mashing continues to be a bit unpredictable and I can't seem to buy an oxygen tank that has any oxygen left in it. The mash for whatever reason began at 140 F after targeting 152 F. I have no damn clue how it started out this low; I preheated as I always do, calculated out my strike temp but missed my target by 12 degrees. Luckily I brought up the temp quickly with boiling water, but this low initial temp may likely produce a drier than desired English Extra Special Bitter. The mash pH as well continues to be unpredictable, and I consistently hit 5.4 pH at mash temps. Not sure this is a bad thing as I often hit this pH and produce beers, but I've found that when I hit 5.1 or 5.2, my beers are much crisper, acidic, and generally more like a commercial example of the style than if I hit a slightly higher mash pH.

The new thermowell for the temp probe
For the second time it seems I purchased a disposable oxygen tank that was completely empty. I have no damn idea how this keeps happening; the first O2 tank I bought had plenty of oxygen, and I know these tanks are not meant to be refilled, so I have no reason to believe that I needed to have these tanks filled in the first place. For the second brew in a row, I had to resort to an old method of aeration which this week happened to be simply sloshing the beer around in the carboy. Hopefully there was a sufficient amount of oxygen mixed into the wort when it came time to pitch the yeast.

I am hoping that I'll have at least a few more chances to brew all-grain before my move, with either a Belgian Dubbel brew or a Biere de Noel with the Trappist High gravity planned soon. If not, I may have to wait a while before I'll have the chance to brew again, so I'm happy that the last few batches I've brewed are ready to drink just before winter comes.
________________________________________________

Bottling the Belgian Tripel


Sanitizing the Belgian Corks
After about a month in the carboy I was able to bottle the Belgian Tripel in 750 mL cork and cage Belgian beer bottles. After the failure of many of the bottles of Belgian Biere de Garde to carbonate in the Belgian beer bottles with plastic stoppers, I knew that I had to go with Belgian corks if I was to ever bottle a batch of beer in Belgian bottles. Fortunately, the wine corker I have works quite well with these corks (with a few modifications) and I was able to bottle the entire batch in both Belgian Beer bottles and Belgian "Champage" style bottles.

I added about 5 ounces of cane sugar to prime these bottles with which should carbonate the beer to about 3.0 volumes of CO2. The flat beer tasted fantastic, so I can only imagine with some added carbonation and a slightly colder serving temp, this beer will be great for winter.

Baking "Mashed" Bread

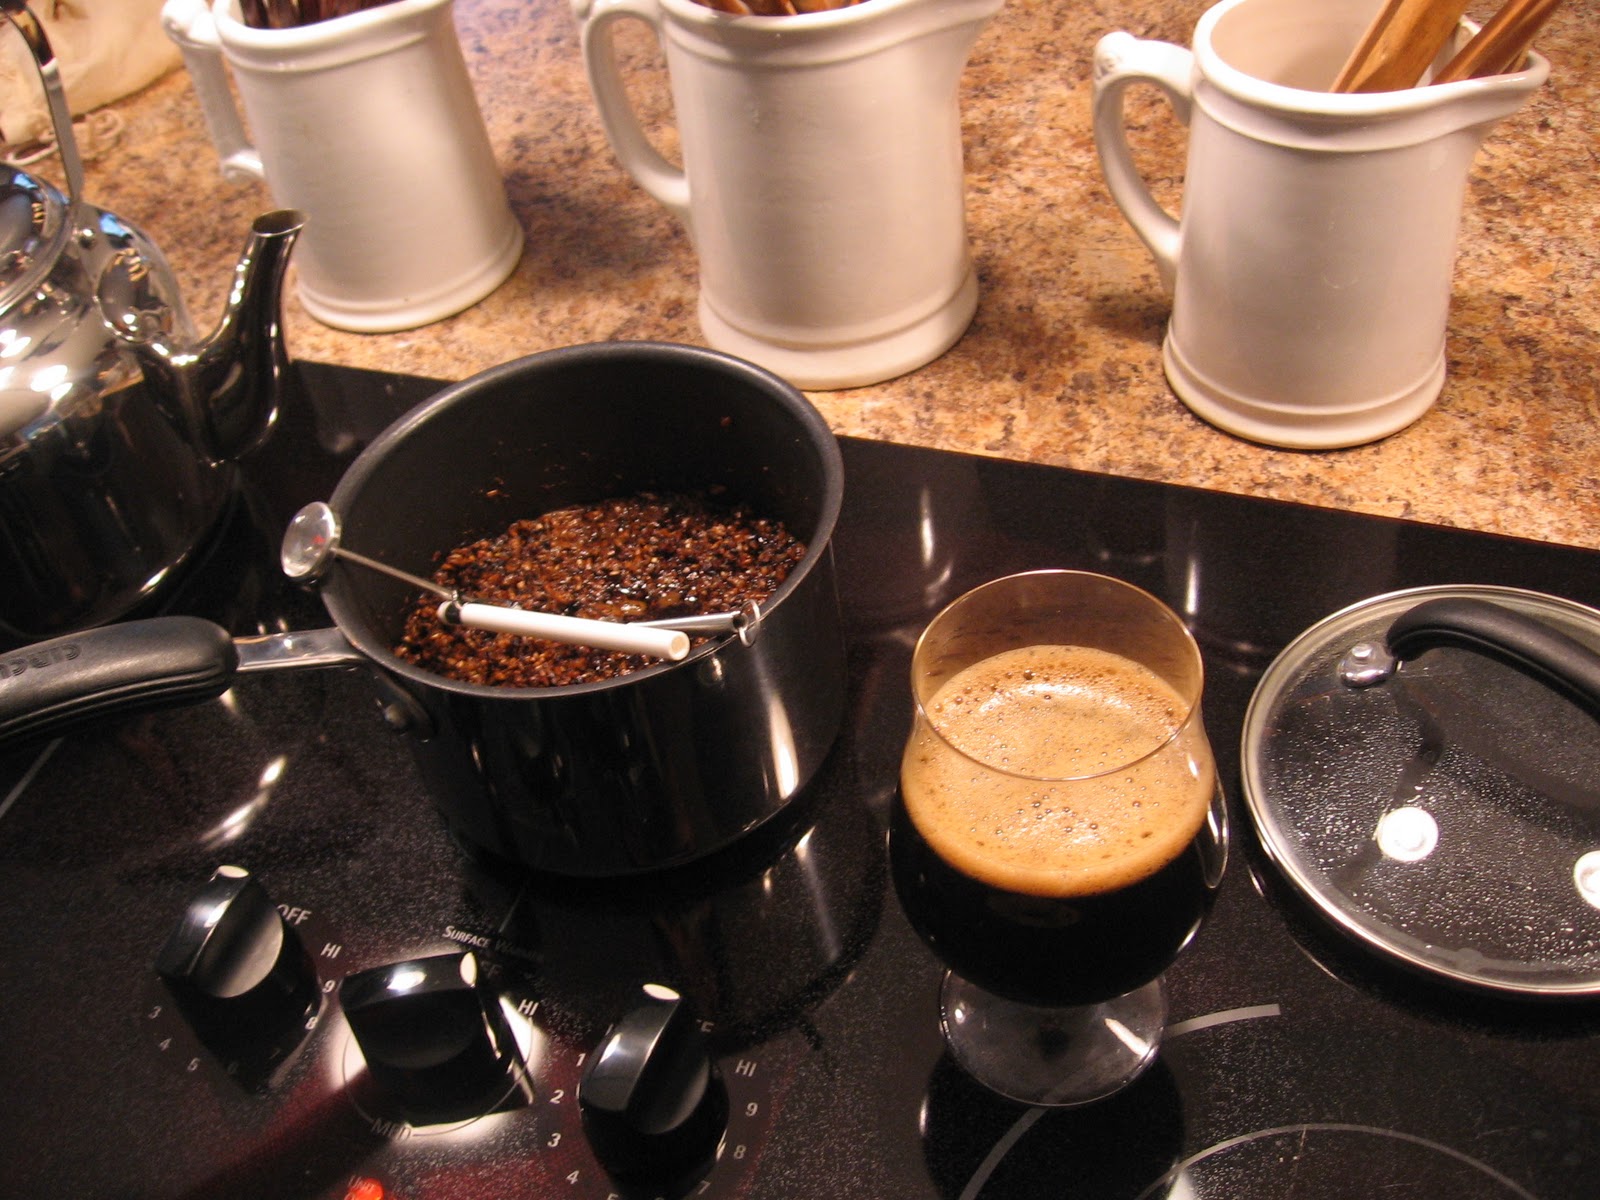
Mashing the Specialty Grains with a glass of Murphy the Stout Hearted
I've baked a few batches of spent grain over the past year, but this time around I wanted to experiment with some extra specialty grain I had lying around. I threw together some wheat, crystal 60, carapils, crystal 120, and a lot of chocolate malt and mashed it all for about 20 minutes on the stove, then proofed my bread yeast using the resulting wort from the mash. This all went into the mixing bowl with bread flower and baked. The bread had the exact color of Chocolate malt and the roastiness of the malt comes through a bit with a lot of chocolate malt flavor. The two loaves taste great, and I'd really like to see what some "mashed" bread would taste like if I went with a crystal malt instead.
The "mashed" grain bread dough

Wednesday, October 26, 2011

#23 Black Butte Porter (clone #2)


One of my favorite styles of beer is Porter, and I don't think there's a better time to drink Porter than the fall. Although I'm a bit late with this brew, as it won't be ready until mid November, I'm glad to get to brew a beer style I love so much.

Black Butte has been one of my favorite Porters if not one of my favorite beers since I had a couple with my girlfriend out in Portland, Oregon. Unfortunately due to lack of distribution out to the East Coast, I haven't had it for quite a while and cloning the brew is the only way to come up with a beer that at least begins to compare with such a great beer. I brewed a clone of this beer last fall with the Wyeast 1968 London ESB strain, and it was one of the first beers I think I brewed that I was really happy with. I plowed through the keg with my dad and was sad to see it go then, so I'm hoping this brew will at least match the previous attempt.

The current recipe for this clone came from Can You Brew It? on the Brewing Network. It looks very similar to the recipe I went with last year with only a British Chocolate replacing the Black Patent I used last year. Since I was unable to find this lower Lovibond British Chocolate as described in the recipe, my local homebrew store owner suggested some dehusked black malt to give the color of a Robust Porter without an over the top roast quality to the beer. I really love what dehusked black malt does in a beer so I'm hoping it meshes well with the other specialty grains and hops.
Black Butte Porter


Batch Volume (Gal): 6.0
Pre-Boil Volume (Gal): 6.5

Total Grain (Lbs): 13.79
OG: 1.060   Anticipated FG: ~1.012   
Anticipated ABV: ~6.33%

IBUs: 37.5
SRM: 26.4
Brewhouse Efficiency: 73%
Boil Duration: 95 min

Grain                                                  (Lbs/oz.) (%)
Malteurop North American 2-row    10.6     76.9
Wheat Malt                                            1.4      10.2
Crystal 80                                              0.7        5.1
Cara-Pils Dextrin Malt                       0.42       3.0
Chocolate Malt                                     0.42       3.0
Dehusked Black Malt                          0.25       1.8

Hops                      (AA%) (IBU) (Oz.) (Boil[min])
Galena                     14.1    30.3    0.5         90
Cascade                    6.0     6.0      0.5         30
German Tettnang   3.5     1.1       0.5         5

Yeast
Repitched 100 mL of thick, dry, clean 1968 London ESB yeast slurry from Ordinary Bitter

Water
Ca: 117 Mg: 2 SO4: 42 Na: 27 Cl: 66 HCO3: 183

Mash Schedule
Single Infusion   5 min 150 F (aimed for 154-155 F), raised up to 155 F at 15 min for remaining 45 minutes of mash, 10 minute mashout at ~165 F
In Mash: 4 g CaCO3, 2 g NaHCO3, 5 mL of Lactic Acid; pH ~5.4
  added 5 mL of Lactic Acid at 15 min; pH ~5.2-5.1

Overall the brewday went fairly well. I would have preferred to hit a mash temp of 154-155 F for the entire 60 minute mash and has a pH of 5.1 as well. The low mash temperature may not necessarily result in an overly dry beer; the usage of carapils dextrin malt should provide a bit more dextrin sugar in the finished beer, and the 1968 yeast strain is fairly flocculent resulting in a strain that is a relatively low attenuator. This should leave a little bit more of a body to the finished beer if the yeast fails to eat all the available sugars. I think the beer should turn out fairly crisp however due to the malts, salts added, and the pH of the mash I eventually hit. I was a little worried upon tasting the mash runnings; I could taste lactic acid fairly easily. I think the large additions of CO3 and HCO3 likely buffered the Lactic Acid additions, thus leaving me with the high pH to start with. Hopefully the lactic acid flavor will not be apparent in the finished beer.
The mash after a 10 minute mashout at 165 F
I also failed to watch the sparge close enough and ran off too quickly, but luckily I collected only a bit more wort than I had hoped to collect, a mistake that only increased my targeted OG by three points and decreased my targeted water profile by a few ppms in each ion concentration. I don't think this will have any detrimental effects as I've done this a few times before. 

What I am worried about is the fact that I had no oxygen to aerate my wort with once it came time to ferment the beer. Apparently I was sold a disposable oxygen tank that had no oxygen in it. I'm not sure if it had a leak, was empty when I got it, or what the deal was exactly but there was no oxygen to put into the wort. I had to resort to my method of aeration that I haven't used (for good reason) for the past two years at least of brewing. I aerated using a pyrex dish to splash the wort for about a minute; hopefully this won't result in any infection. In addition to the splashing, as I do with every beer, I also splashed the wort as I transferred from the boil kettle to the fermenter. The most I can hope to have put into the wort is 8 ppm of oxygen, not the amount I usually can with oxygen, but hopefully the yeast are healthy enough to ferment this beer well regardless.

In order to repitch the 1968 yeast strain I had to transfer the Ordinary Bitter into a keg. My goal was to partially imitate cask conditioning of this particular beer, so I added about three ounces of priming sugar during the transfer. The 1968 yeast was such a strong flocculator however, that I was worried there would be too little yeast to naturally carbonate the beer in the keg. I added a few mL of yeast from the bottom of the fermenter to ensure I could produce the necessary secondary fermentation. I'm really excited for this beer to condition and carbonate soon as I think it'll make for a great session beer, just in time for some colder weather.

Monday, October 17, 2011

#22 Ordinary Bitter


It's been a long wait for the Belgian Tripel to finish fermentation, and now that it's finally wrapping up activity, I was able to start the new strain of Wyeast 1968 London ESB yeast in an Ordinary Bitter. With all the additional sugar added and the high gravity of the Tripel, it took a while for me to see activity slow and was hesitant to take the beer out of the fermentation chamber too early. I think I'll let it settle out at basement temperatures and bottle it when I get a chance in 750 mL cork and cage bottles while saving the Trappist High Gravity strain for either a Dubbel or Dark Strong/Quad brew later this fall.

The Krausen on top of the Ordinary Bitter
after about 16 hours
Out of the yeast strains that I have used so far in my brewing, the 1968 London ESB strain is by far my favorite. If there was one strain I had to select as my "house" strain, the 1968 would be the one I would go with. I used it last fall to brew a Porter (Deschutes Black Butte clone) and a strong ESB. Both came out fantastic with a slighly sweet finish, very silky, malty, nice fruit flavors, and just overall great beers for fall and winter drinking. This time around I want to use the strain as much as possible, and I'm hoping to step this strain up starting with the low gravity Ordinary Bitter, then progressing to a Porter, and finishing with the same strong ESB recipe I created last year.

"Double-dropping" the Ordinary Bitter
into a second fermenter
Last summer I brewed an Ordinary Bitter with the Thames Valley strain and after hearing about the "Double-Drop" method of fermentation used by the brewers at Brakespear for their Ordinary Bitter, I chose to do the same. Although I made the beer undrinkable with an overzealous addition of gypsum salt, I could taste a nice, unique, and what I thought to be English fruit and malt character in the beer. This could be due to the yeast alone, but I'd like to see what the double drop does to this year's Ordinary Bitter. The beer's been at about 66-67 F overnight and has formed about an inch of Krausen. After "droping" the beer into another fermenting bucket, the beer and active yeast were able to separate from any trub that made it into the fermenter from the boil kettle. I splashed the first gallon of the wort coming from the fermenter into the bottom of the new fermenting bucket, adding additional oxygen into the wort to allow for a unique fermentation. The theory is that adding additional oxygen after fermentation has begun will allow for additional growth of yeast, additional ester production and thus those fruity flavors, and will put yeast cells on different cycles of aerobic metabolism, anaerobic fermentation, and conditioning. I'm hoping this yeast responds well to this process and if not, I'll likely give this beer another shot either before or after brewing up the Porter.

I also plan on trying to serve this beer in a way at least partially resembling a traditional English cask. I'll transfer to the keg, with priming sugar (and hopefully some finings if I can get some before that time), allow that to carbonate and condition, and either serve with a small amount of CO2 at my basement temperature, or serve from the kegerator at slightly colder temps.

Ordinary Bitter

Batch Volume (Gal): 6.0
Pre-Boil Volume (Gal): collected 4.0 of wort, 
     topped up to 6.0 before boil

Total Grain (Lbs): 8.34
OG: 1.036   Anticipated FG: ~1.009   Anticipated ABV: ~3.54%

IBUs: 32.9
SRM: 13.6
Brewhouse Efficiency: 70%
Boil Duration: 95 min

Grain                             (Lbs/oz.) (%)
Pearl (British) 2-row         7        84.0
Crystal 120                       15 oz.    11.5
Special Roast Malt           6 oz.     4.5

Hops                          (AA%) (IBU) (Oz.) (Boil[min])
East Kent Goldings   4.5      25.4    1.25         90
East Kent Goldings   4.5       7.5      0.8         30
East Kent Goldings   4.5        0      0.75          0

Yeast
Pitched Wyeast Activator packet of 1968 London ESB yeast directly into wort

Water
Ca: 100 Mg: 2 SO4: 205 Na: 10 Cl: 29 HCO3: 45
Mash Schedule
Single Infusion   60 min 150 F (aimed for 152-153 F), 10 min mashout at 165 F
In Mash: 5 g CaSO4, 0.5 g NaHCO3, 1 mL Lactic Acid; pH ~5.1-5.2
In Boil: 3 g CaSO4, 1 g CaCl2

Relative to my experience brewing the Tripel, this brewday went great. The only number that I had hoped to hit but failed to was my mash temp. I'm not sure this will be a huge issue for the final beer since there are many variables that could have produced a more dextrinous beer even before I had a lower mash temp, so I'll just have to see how this beer ferments out. I also could have done with a bit more yeast (1.2 packets of yeast or made a starter instead of just pitching one) but I'm sure this beer will ferment fine with the yeast I added. If anything it'll make for a beer that is a bit fruitier and finishes a bit higher, which with my lower than desired mash temp, could be a good thing.
The new "hands-off" grain mill setup
After a few brews with plenty of frustration due to my grain mill, I think I've finally found a happy medium between wet and dry milling. I realized that I have been using a bit too much water to condition my malt before milling and that has just turned my malt into dough on the rollers, causing them to bind up and in essence creating mush instead of grist. I only used about 100 mL of water for this particular grain bill (the suggested rate is about 100 mL per 11 lbs of grain) and it worked beautifully. With some additional time for the grain husks to absorb the water I sprayed before milling, the grist was crushed very easily without having to stop halfway through milling and without any dough buildup on the rollers. The grist looked just as great as it has when I've wet milled properly as well; very pillowy with the majority of grain husks left intact and the starch ground into both large and smaller particles. Hopefully this wet milling process will work with some future brews as wet milling is something I'd really like to continue using as part of my brewing process.

Once this Ordinary Bitter ferments (hopefully within the week) I plan on brewing a Porter with the 1968 strain and then possibly continuing the Trappist High Gravity strain with another strong Belgian ale. It'll be good to have another beer on tap (or "cask") as my supplies of homebrew are dwindling and I need a sessionable beer before football season is over.

Tuesday, October 4, 2011

Fermentation Control Upgrade

The Ranco two-stage controller holding the Belgian Tripel fermentation at 69 F
The fermentation chamber has done a fantastic job of holding the proper fermentation temperatures for the past few brews, however I realized that sooner or later, I would need a controller and a method of heating the ferment if I hoped to get the process of fermentation under the control I have hoped for.

The AC unit so far has been great at holding fermentation temperatures steady. Depending on where the beer is in the process of fermentation, I would simply let the analog thermostat of the AC unit cool the chamber to a few degrees below my targeted fermentation temperature. The cooling of the AC would equilibrate with the heat produced by the yeast during fermentation, and result in a constant temperature. This process worked well, but necessitated frequent checking of the beer's temperature, which could only be viewed by opening up the chamber and looking at the temperature strip on the side of the carboy (in the process, releasing the cold air from the chamber). 

The AC unit was also made more inefficient by the fact that without a controller, there was no way of having the unit turn on only when needed. The unit was constantly running and was more often than not simply circulating air inside the chamber with the fan inside the unit. Rarely would the AC unit kick on to cool the fermentation. It was obvious that much of the time the AC unit was on it was simply wasting energy.

The most significant concern I've had with respect to the fermentation chamber was that as the weather has gotten colder, the need for cooling has decreased while the need for heating has increased. The chamber has been doing a decent job of insulating the beer from these colder temperatures, but I'm sure that soon the heat created by fermentation will not be enough to heat the inside of the chamber.
After doing a bit of searching, I found a great fermentation control system on MoreBeer.com. The controller is a Ranco digital two-stage controller which allows either two cooling units, two heating units, or my current arrangement, one heating and one cooling unit to be turned on and off according to the temperature of the fermentation. I currently have the probe taped to the side of the fermenter and insulated with some cloth, but I think it's registering a slightly lower temperature than the actual fermentation temp. 

Along with the controller purchase, I also bought a thermowell that will solve this issue. The thermowell is a stainless tube just wide enough to hold the temperature probe of the controller. The thermowell will be immersed in the center of the fermenting beer and offer a more accurate temperature reading. The difference between the exterior fermentation temp (as I have been reading it from the fermentation strip on the oustide wall of the carboy since I began brewing) and the internal temp of the fermenting beer will be very small since the volume of fermenting beer is fairly low, but I'm anal and this should offer me the best temperature reading I can get.

The probe (grey cord) measuring ferment temp, the FermWrap (black cords) heating the ferment
The piece of equipment I chose to heat the fermentation is the FermWrap. The wires of the FermWrap split into a grid of coils in a plastic sheet, much like the way in which a window defroster for the back window of a car works. The plastic sheet wraps about 3/4 of the way around the carboy and allows for heating directly to the side of the carboy. So far it appears that it is a quick and efficient method of heating the ferment. The only time I have seen either the AC or FermWrap turn on (other than when I am stepping up temp on the controller) the FermWrap came on for a few minutes to heat the ferment back up one degree and quickly shut off after. Overall I am ecstatic with this particular purchase; I think it is likely the most valuable brewing equipment purchase I have made. It should allow for brewing of any ale style I can think of, and with some tinkering I have planned in the future on the AC unit, it could even allow for me to begin brewing lagers in cooler months. The thought of a Baltic Porter or DoppleBock during the winter has me excited to see if I can achieve lagering temperatures with my new fermentation chamber setup.

Tuesday, September 27, 2011

#21 Belgian Tripel

The Cascade Wet Hop Harvest Ale
Now with the brewing and serving of O Hike Ale over with, I am excited to get into brewing more outside of the 1056 American Ale brewing. Brewing the test batch of the O Hike, the Terrapin Rye Pale Ale, the American Wheat Ale, the O Hike final batch, and the Wet Hopped IPA has allowed me to brew a lot with the very typical and very common 1056 strain a lot in the last few weeks. It's a grain strain to use; very resilient to any mistakes you make as a brewer and often produces a great beer, but I'd like to produce beers with some additional variety for the fall and winter months.

The Trappist High Gravity 3787 strain from Wyeast should get me out of my American Ale yeast funk. I've wanted to brew either a Belgian Tripel, Belgian Golden Strong, Belgian Quad, and/or a Belgian Strong Dark for some time now, and I think this yeast will make for a fantastic Belgian strong ale if I use it correctly. Since I have a few dark strong ales available at the moment, I thought that a Tripel or Golden Strong would make the most sense, possibly a brew for mid-winter. Jamil Zainascheff had yet another seemingly straightforward yet quality recipe for the Tripel style, so I chose to go with it.

Belgian Tripel

Batch Volume (Gal): 6.0
Pre-Boil Volume (Gal): 7.0

Total Grain (Lbs): 14.25
OG: Post-Boil: 1.060   With additional sugar during fermentation: 1.080
Anticipated FG: ~1.012
Anticipated ABV: ~9.02%

IBUs: 33.8
SRM: 6.8 (most likely darker)
Brewhouse Efficiency: 67%
Boil Duration: 95 min

Grain                                                (Lbs/oz.) (%)
Weyerman German Pilsner Malt       14       83.6
(What I believe to be) CaraAroma    4 oz.     1.5

Cane Sugar (added during ferment)  2.5     14.9

Hops                     (AA%) (IBU) (Oz.) (Boil[min])
Styrian Goldings    4.5      32.8    1.7          90
Czech Saaz              3.0       1.0    0.5           5

Yeast
Propagated 3787 Trappist High Gravity propagator pack three times to produce ~150 mL of yeast. Pitched ~110 mL of thick yeast slurry, pitched remaining yeast from starter diluted with water. Aimed and hit to pitch between 112 mL and 150 mL of yeast. 112 mL suggested pitching rate for 1.060 OG (when fermentation began), 150 mL suggested rate for 1.080 OG (after additions of cane sugar).

Water
Ca: 85 Mg: 2 SO4: 19 Na: 15 Cl: 17 HCO3: 164
(targeted Chimay water profile, carbonates lower than desired)
1 Whirlfloc tablet (5 min)   1/2 tsp yeast nutrient (5 min)

Mash Schedule:
Single Infusion   60 min (roughly 148-149 F, dropping at mash progressed)
10 min mashout at 170 F
1 g NaHCO3, 0.5 g CaSO4, 0.5 g CaCl2, 4.5 g CaCO3,
6.5 mL Lactic Acid (60 min), ~5.4 pH (30 min),
added additional 2.5 mL Lactic Acid (30 min, ~5.4 pH (5 min)

Yet another seemingly hellish brewday, but I'll have to see how the beer turns out to make the final judgement. My mill continues to create issues. I think at this point I will have to abandon wet milling altogether, if not for a while and begin wetting the grain to a lesser extent. The mill rollers, even though I am taking much better care of them now, still struggle towards the end of milling. The drill is unable to continue to mill once the rollers have turned the grains to mush. This can't be a good thing for mashing and could be resulting in tannin extraction, although I think overall wet milling has likely decreased tannin extraction. I'm not sure if the failure is the drill being weak, the grain being too wet, or this mill not being capable of handling wet grains. I'll have to go back to dry milling, and at some point, possibly begin experimenting with wetting the grains to a lesser extent.

My mash numbers seemed to be a bit off, and I continue to be a bit confused over what exactly I should be measuring when it comes to mash pH and mash temperature. I chose to measure temperature on top of the grain bed and below as I had on the previous brew. My measured temp I went with was the one I measured below the level of the grain bed (~148 F), but I have little way of knowing what temperature is most significant. I would like to get a thermowell and thermometer and install both in my mashtun, but this may be an upgrade for the future. In the meantime I'll have to monitor some area of the mashtun consistently to get an idea of the final that will be produced. pH was especially confusing since I initially hit a pH of 5.4, then added an additional 2.5 mL of Lactic Acid and still hit the 5.4 mash pH. This is a beer that is more likely to benefit from a "softer" texture, and so I am ok with a higher mash pH, but I am a bit confused as to how adding the additional acid resulted in no pH change. I think this is another area where investing in equipment to measure weight in grams, volume in mL, and a legitimate pH meter may come in handy in the future.
My issue with my mill would not ultimately be my only issue. I again had a stuck mash (2nd time in the last three brews), however this stuck mash was most likely due to me not attaching my outlet tubing in the mashtun to the false bottom with a hose clamp. Since first brewing with this mashtun assembly from Northern Brewer, I haven't been using the hose clamp that clamps the outlet tubing to the false bottom since I had one particular brew where I had a stuck mash due to the outlet tubing being twisted, crimping, and making it impossible for any wort to drain from the mash. In the future, I'll either have to either clamp this tube as I should be doing and make sure not to twist the outlet tubing, or clamp tubing that is unlikely to crimp due to the high temperatures silicone tubing experiences in the mash. This issue, as with the mill, are most likely only frustrations on brew day, and are not likely to result in a lower quality final beer, but the mash issue most likely did result in my lower efficiency (67%). It would make things more enjoyable to avoid issues like this altogether in future brews.

For the first time, I had a blockage in the flow of wort into the fermenter after chilling. I've never had this happen, and after this particular brewday, it didn't really surprise me. With such a small addition of hops, I had not idea how the strainer could be blocked. After using a sanitized ruler to strip away some of the hops from the strainer, I was finally able to collect a little over 5.5 gallons. It looked like it was only hops that clogged the filter, not protein. I'm thinking this is most likely due to not allowing enough time for the trub to settle to the bottom before draining the boil kettle. Again, I'll have to see how the strainer works during the next couple brews, although I've never had an issue with it before so I'm confident it won't be a reoccurring problem.

One issue that I think may be more significant in the resultant beer is the fact that I think I was given CaraAroma malt instead of Aromatic malt at my local homebrew store. I guy filling in for the homebrew store owner I think must have seen "aroma" when I asked for "aromatic" and thought it was the same type of malt. The CaraAroma is much much darker and will likely result in a different flavor, similar to the flavors in a Belgian Dubbel or Belgian Dark Strong, but it will be interesting to see how this malt plays out in a Tripel. The beer came out of the boil kettle a dark amber, so I'm hoping the flavor isn't overpowered by this malt.

Once the equipment I have ordered for the fermentation chamber arrives, I hope to keep this fermentation under control as I add the additional cane sugar needed to dry out and strengthen this brew. Then, I may or may not repropagate this particular yeast, and either try brewing a dubbel or dark strong for the colder months.

Thursday, September 22, 2011

Labeling the O Hike Ale


After a week of fermentation, a little over a week of dry hopping, and two weeks bottle conditioning, the O Hike Ale is as ready as it's going to be for reunion.

The batch yielded a total of forty-five 12 oz. bottles, forty of which I'll be serving at reunion; the other five I chose to sample over the past week to ensure this was a beer I was confident in serving. The first bottle I tasted was still in the process of conditioning, so I was a bit concerned that the rest of the batch would continue to taste as that first one had. Luckily the other beers I've had from the batch have conditioned, carbonated, and cleaned up nicely.

The most noticeable quality of the beer that, I feel is a detriment to the overall perception of the beer, is the level of hop bitterness. The test batch came out quite sweet, and I was somewhat more comfortable serving a beer like it at reunion than an overly bitter beer. A bitter beer may be more appreciable by a seasoned craft beer drinker like myself. For the typical American beer drinker (or non-drinker) that is unfamiliar with hoppy beers, the final batch may be less palatable.


On a positive note, I feel that the final batch came a lot closer to  the beer I attempted to clone, Gordon (aka G'Knight) from Oskar Blues. I believe the fermentation chamber I built helped quite a bit by allowing for lower fermentation temperatures. The fermentation was much "cleaner" than with the test batch, and thus the final beer has less of the fruity esters and hot alcohols of the test batch. The lower mash pH I also believe greatly improved the quality of the beer. As the result of hitting 5.1~5.2 pH during the mash, I believe it made for a much crisper and brighter beer as I had expected. Whether this was actually due to mash pH or not, I'll have to see with future brews. The beer finished perceivably drier as well, and although this may not be due to a lower final gravity (I last measured it at 1.020, the same FG as the test batch), the resulting taste of the beer is not as overly sweet as the test batch tasted.

It took a while to finalize the label, but I think it came out well and will hopefully offer a few laughs for people during reunion. I feel like I can't go wrong with an ode to Doc Overaker (the subject in both the front and back labels). He's one of the few figures at Holderness that is both instantly recognizable and central to the identity of the school, as well as capable of inspiring amusement with any of the anecdotes that surround his time as a teacher. Glad to hear he is back teaching at Holderness, and I hope he never hears he was the subject of this particular project!


Thursday, September 15, 2011

#20 Cascade Wet Hop Harvest Ale

The American Wheat Ale with Willamette Wet Hops
Seeing as my first attempt at growing hops did not result in the yield I had hoped for (three dead hop rhizomes and no hops) I thought that there would be no chance to make a true "Hop Harvest" beer, a style common during the months of August and September. The end of summer and beginning of fall is the perfect time to harvest hops, and many homebrewers/craft brewers often use all or a portion of their fresh hops in hop harvest ales.

Wet Hops still on the bine before picking
I was lucky enough to have my local homebrew show owner, Todd Tilton of the Fermentation Station, give me a huge crop of Cascade wet hops that he was unable to harvest. After hours of picking, I was able to fill a five gallon bucket just under the brim. Half of the hops went to Todd, and my half yielded roughly 43 ounces of wet hops. Wet hops can weigh anywhere from 7 times to 5 times as much as dried hops. Based on an estimated 6:1 ratio of wet weight to dry weight, I yielded roughly 7.16 ounces of dried hops, had they been dried rather than used as wet hops.

Using this many wet hops proved to be difficult as I had no idea of their alpha acid percentage and my true dried weight yield. In order to get my IBUs within the correct range for an American IPA, the majority of the bittering came from the Columbus hop addition at 90 min. Knowing the alpha acid content for this particular hop allowed me to get my IBU value within the accepted range for an IPA. The only potential for variance in my actual IBU level will be the ten minute addition of the wet Cascade hops, which will result in very little influence in the overall bitterness of the beer.

Wet Hops after picking
In the future, when brewing with wet hops, I hope to brew with them closer to the time at which they are harvested. I got these hops a couple days after they were harvested, it took me a few days to pick them all, and it took me a few days to actually get to brew the beer. Likely during this time I lost some of the aromatics of the hops, and this could result in a beer that lacks the intensity of aroma I was hoping for. However I believe that since my hop additions of the wet hops were so large, this will likely compensate for any loss in aromatic potency. During storage, these hops did begin to mold as well, and the aroma in the bags in which I stored the hops took on a very vegetal, tea like aroma. I don't think this will contribute much to the aroma of the final beer due to the boiling of the wort and evolution of this aroma, but it is something I am very worried about tasting in the final beer.


Cascade Wet Hop Harvest Ale

Batch Volume (Gal): 6.0
Pre-Boil Volume (Gal): 6.33

Total Grain (Lbs): 14.26
OG: 1.060 
Anticipated FG: ~1.012   
Anticipated ABV: ~6.33%

IBUs: 55.2 - 65.1 
(estimated at 63.4)
SRM: 9.6
Brewhouse Efficiency: 71%
Boil Duration: 95


Grain                                                 (Lbs/oz.) (%)
Malteurop North American 2-row       12     84.2
Crystal 40                                                 1          7
Munich Malt                                         6.5 oz.   2.8
Victory Malt                                           6 oz.     2.6
Crystal 60                                            4.15 oz.   1.8
Rye Malt                                               3.5 oz.     1.5

Hops         (AA%) (IBU)                (Oz.)                   (Boil[min])
Columbus    14       54.1                  0.9                            90
Cascade    ~5.75    0-9.9 ~2 oz. dry (12 oz. wet)            10
Columbus    14        1.1                    0.1                            10
Cascade        ~          0  ~5.16 oz. dry (40 oz. wet)          0

Yeast
Harvested 1056 American Ale yeast from O Hike Ale, built up yeast in two starters, and separated yeast from majority of hop/trub material from the O Hike Ale. Pitched ~125 mL of fresh yeast with moderate amount of hop material in slurry.

Water
Ca: 123 Mg: 2 SO4: 242 Na: 16 Cl: 38 HCO3: 59 
(targeted Randy Mosher Pale Ale water profile)
1 Whirlfloc tablet (10 min)   1/2 tsp yeast nutrient (10 min)

Mash Schedule:
Single Infusion   60 min (top of mash lower than 150 F) middle of mash 151-152 F, 10 min mashout at 170 F
1 g Baking Soda (NaHCO3), 10 g SO4, 1.5 g CaCl2, 
2.5 mL Lactic Acid (60 min), 1 mL Lactic Acid (50 min)
(all in mash); ~5.4 pH (55 min), ~5.1 - 5.0 pH (45 min), ~5.2 pH (15 min)

Measuring original gravity of the wort
It'll be interesting to see how this beer turns out due to all the variables and unknowns I experienced during the brewday. The hops are a big question; not sure how well they will produce aroma in the final beer, and there could be an off flavor produced by the fact that the hops had started to spoil on the day I brewed with them. 

My malt mill screwed up my first attempt to brew this beer the day before, and after milling 2/3rds of my total grain bill, I was forced to stop. On what ended up being my actual brewday, I finished the milling of the grains to find that the grains I had wet milled the day prior had started to get a little funky, most likely from the moisture, the cracked and exposed starch, and the bacteria (I think lactobacillus) that exist naturally on barley husk. After tasting the wort and some of the grains, there didn't seem to be any flavor from this possibly souring of the grains, but there may be some influence perceived in the final beer. 

Trying to avoid a boil over during the hot break
My measurements of the mash were also confusing, as I decided that I should begin to measure mash temperature in multiple locations within the mash itself. Using brewing software, I typically add two degrees to my strike water's temperature in addition to the temperature calculated by the software. This has often allowed me to hit my mash temperature exactly; however, I've begun to think that it has only been necessary for me to compensate by adding two degrees simply because I measure my mash temperature at the top of the grain bed where the mash is likely to be a bit colder. This is not entirely significant, as the purpose for measuring mash temperature is simply for consistency's sake, and evaluation of whether a mash temp should be changed is simply due to the final taste of the beer. After brewing the O Hike test batch and the final batch and discovering that both beers finished higher than I had hoped, I began to think that this could ultimately be due to an inaccurate measure of my mash temperature. I submerged one thermometer while also measuring mash temperature on the top of the grain bed as I usually do, and I found the temperatures to differ widely. The top of the grain bed (even though I had aimed for 152 F) was below 150 F, while the interior of the mash was measured anywhere from 151 F to 154 F at one point. I can't exactly find a reasonable average for the temperatures I observed, so it will only be after tasting the finished product that I will be able to come to some conclusion about my mash temperature. I will have to monitor this variable much closer in the next few brews, and hopefully I will come to more of an understanding about the temperatures I should be aiming for.

Just after adding the 10 minute addition of wet Cascade hops
Mash pH was another variable I found to be inconsistent during the duration of the mash. Initially I had hit a fairly high pH (~5.4 pH at mash temp, ~5.7 pH room temp). The software I use to predict mash pH has mentioned that it may take up to 15 minutes for mash pH to equilibrate, and therefore this high pH measure may have been taken too soon. I chose to add an additional mL of Lactic acid to try and bring the mash pH down, and soon after it appeared mash pH had dropped to ~5.1 (the value I have been aiming for ever since realizing that 5.1 pH at mash temp is equivalent to 5.4 pH mash temp at room temperature, which is ideal). Towards the end of the mash I chose to measure pH once more and found that it had risen slightly to 5.2. However, all these measurements are taken using pH test strips, which due to their color coding are difficult to get a definitive measurement of pH. As with mash temperature, I'll just have to observe pH in the next few brews, and see if I can come to understand mash pH a bit more than I do currently.
Chilling the wort

Overall however, I'm fairly confident that this beer will turn out well. This beer was my first time brewing with American 2-row malt which will make for an interesting comparison with my prior beers that have used only British 2-row. I also aimed for the Pale Ale water profile described by Randy Mosher, and so I am excited to see how my salt additions will influence the final beer. I have never had my calcium levels as high and I have yet to add sodium in a beer, so it will be interesting to see just how these ions influence the final flavor. If I can find epsom salt (MgSO4), I should finally have all the tools necessary to more closely mimic various water profiles, something that I increasingly believe is (behind fermentation variables) the variable in beer that will turn a good beer into a great beer. Since the fermentation chamber has done so well maintaining proper fermentation temperatures for the O Hike final batch and currently the Harvest Ale (fermenting at 66 F), I feel like I am getting closer to ideal fermentations (provided that my yeast pitching is sufficient as well), and therefore water profiles will become more important in my efforts to make even better beer.
O Hike Ale test batch