Tuesday, November 22, 2011

#27 Breakfast Stout


At this point, after already brewing four beers using the 1968 London ESB yeast, I'm still looking for an excuse to brew with this yeast. Since I've been thinking that a low alcohol, yet flavorful beer is great to have on tap, I figured it would have to be a beer about 5.5% ABV or under. I've been thinking about blending a beer with french press coffee as well for some time now, and so the thought of brewing another low gravity beer to accompany the Ordinary Bitter and blending it with coffee left me with the thought of a sessionable Breakfast Stout with coffee.
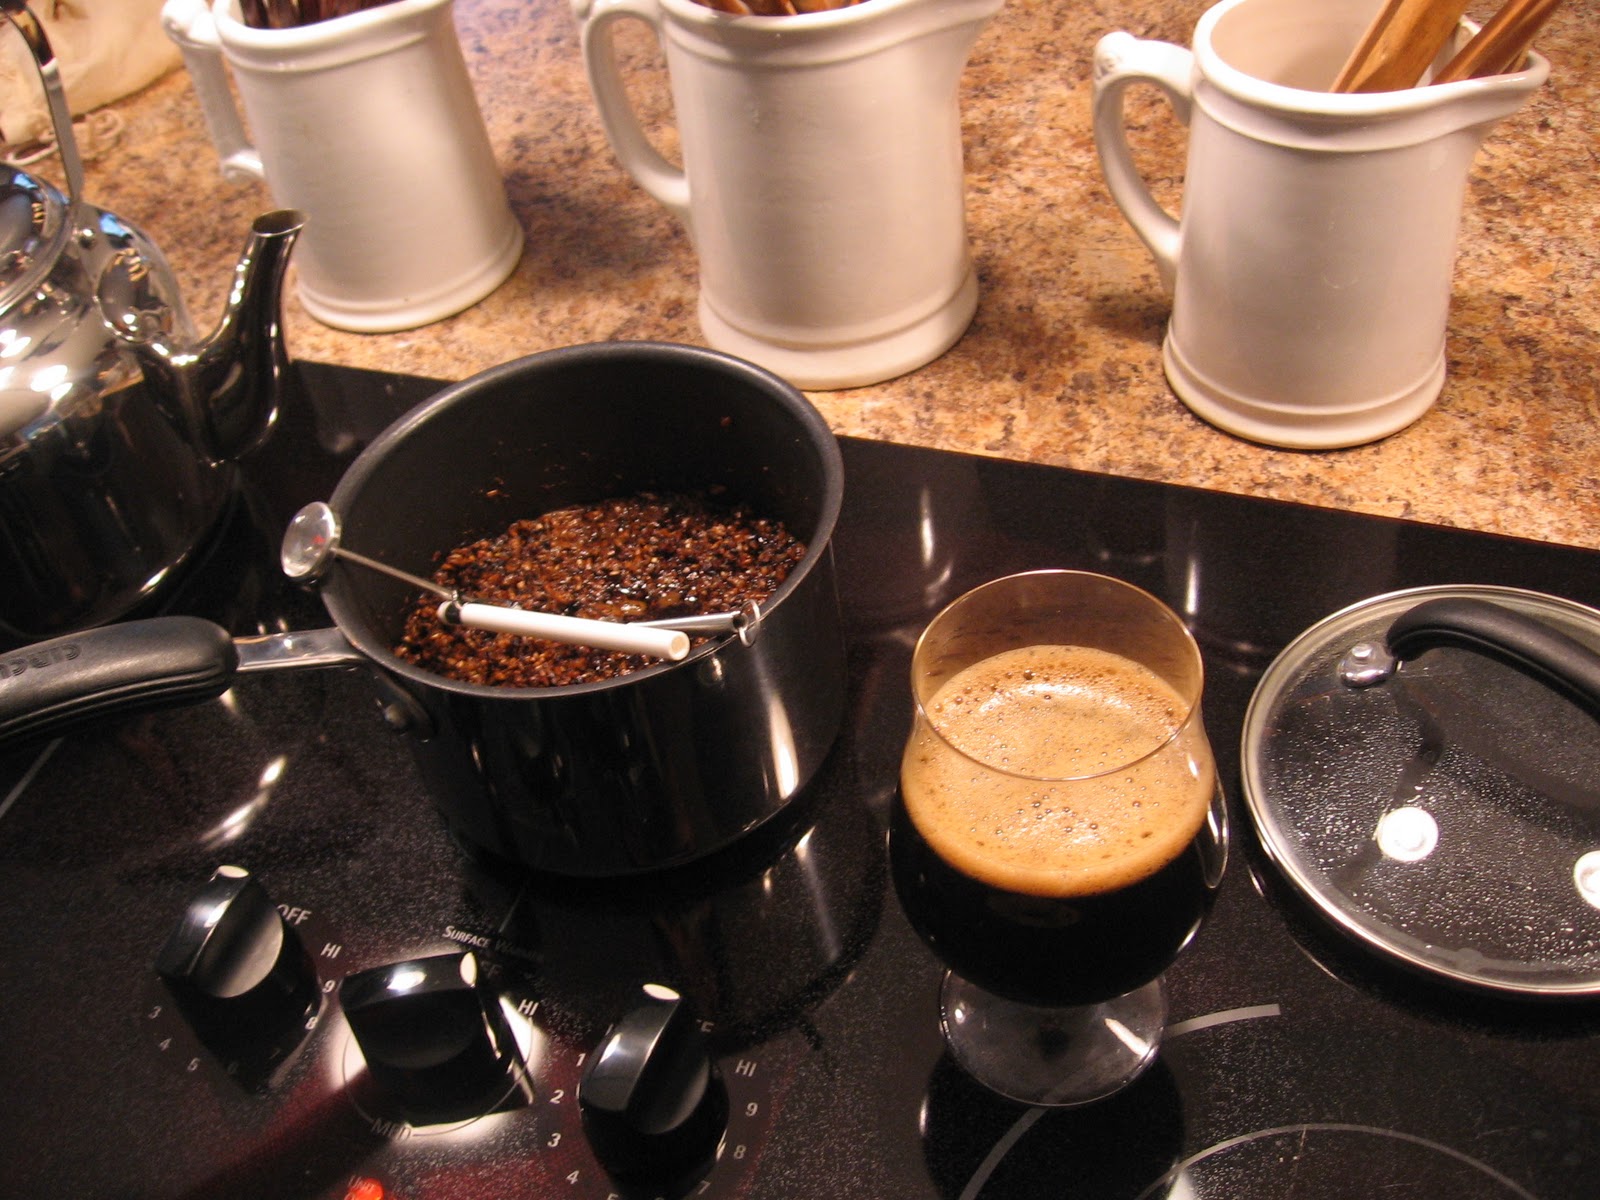
Draining the Breakfast Stout wort

I came up with a simple recipe that should make for a beer you'd want to have with a nice big omelet or bacon and eggs; low gravity, rich and malty, roasty with plenty of coffee flavor, a nice mouthfeel from oats, and if I end up adding coffee, the added roastiness from the coffee as well.

Breakfast Stout

Batch Volume (Gal): 6.0
Pre-Boil Volume (Gal): 4.66

Total Grain (Lbs): 7.75
OG: 1.035   Anticipated FG: ~1.012
Anticipated ABV: ~3%

IBUs: 28.7 (aimed for 23)
SRM: 28.5
Brewhouse Efficiency: 75%
Boil Duration: 95 min

Grain                              (Lbs/oz.) (%)
Muntons Marris Otter        3       38.7
Malteurop                             2       25.8
Munich Malt                         1       12.9
Chocolate Malt                   8 oz.    6.5
Crystal 80                           8 oz.    6.5
Flaked Oats                        8 oz.    6.5
Roasted Barley                  4 oz.     3.2

Hops            (AA%) (IBU) (Oz.) (Boil[min])
Millennium   15.9     28.7    0.4         90 (should be 60 min addition)
Yeast
Rehydrated and pitched 7 grams (0.6 of pack) of Safale-05 (Cal Ale) yeast

Water
Ca: 122 Mg: 2 SO4: 45 Na: 29 Cl: 61 HCO3: 198

Mash Schedule
Single Infusion   60 min ~156 F, 10 min mashout ~170 F

In mash: 2 mL Lactic Acid, 4 g CaCO3; pH ~5.6-58 
In boil: 2 g NaHCO3, 1.5 CaSO4, 2.5 CaCl2

Unfortunately, when it came time to draw off the Ordinary Bitter into the keg, and harvest yeast from the yeast cake, the Ordinary Bitter hadn't completely finished fermentation and much of the yeast that would have fermented the Breakfast Stout was still in suspension in the Bitter. I'm not quite sure why it has taken so long for the Ordinary Bitter to finish fermentation, but I think it may have gotten a late start. Hopefully it will be able to finished fermentation and conditioning in the keg, especially with a yeast like 1968 that needs a good diacetyl rest after fermentation in order to clean itself up.

Pitching the Safale-05 yeast after rehydrating
So instead of trying to use the sub par yeast cake from the Ordinary Bitter, I chose to use one of the Safale-05 packets I have saved in the kegerator just for this occasion. This particular dry yeast I find works excellently, especially after rehydration, and judging by the way it tastes it might as well be a healthy liquid yeast culture. I would have liked to use the 1968 yeast strain again, but the Safale should give me flavors that I'll enjoy as well. It'll be a bit cleaner, but I'll ferment this batch a bit higher at 68 F to try and produce a few more esters. Hopefully the resultant beer will mesh well with french press coffee as a result.

 I'm hoping to have the Black Butte Porter, Buster's Bitter, and the second batch of Ordinary Bitter ready for drinking before Thanksgiving, in time for me to move to a new apartment. In addition, the Belgian Triple and the Belgian Dubbel should finish bottle conditioning as well within the next few weeks, so with the addition of the Breakfast Stout, I should have quite a few beers to choose from. I'm hoping to squeeze in one last brew before I move, some sort of lager using the Bohemian Lager strain, so that I have something in the fermentation chamber while I'm unable to brew. Having no other opportunities to brew ales will give me the chance to lager it for quite a while before kegging.

Monday, November 21, 2011

#26 Ordinary Bitter (Batch No.2)


After enjoying the Ordinary Bitter so much (and so quickly) I thought that I should keep the 1968 London ESB yeast strain going a bit longer with another Ordinary Bitter batch. I don't often brew the same style in such quick succession so I thought this would offer me a chance to brew a bitter more to my tastes. 

Using the recipe I took from The Jamil Show, I made a few tweaks to brew a beer similar to the flavors I tasted in a pint of London Pride from Fullers I had a while back. The London Pride was a bit maltier, cleaner (less fruity/estery), and overall a bit fuller than my take on the style. In order to make these changes, I chose to ferment a degree colder (66 F), use an additional specialty grain for biscuity/bready maltiness (victory), and chose to go without the "double-drop" method I used on the last bitter, although I really have enjoyed the results of this method of fermentation.

Ordinary Bitter (Batch No.2)

Batch Volume (Gal): 6.0
Pre-Boil Volume (Gal): 4.33, topped up to 6.0 for pre-boil

Total Grain (Lbs): 8.25
OG: ~1.037   Anticipated FG: ~1.009   Anticipated ABV: ~3.67%

IBUs: 32.9
SRM: 10.5
Brewhouse Efficiency: 73%
Boil Duration: 95 min

Grain                              (Lbs/oz.)(%)
Muntons Marris Otter       7        84.8
Crystal 120                        8 oz.     6.1
Victory Malt                      8 oz.     6.1
Special Roast Malt            4 oz.     3.0

Hops                        (AA%) (IBU) (Oz.) (Boil[min])
East Kent Goldings   4.5      25.4   1.25        90
East Kent Goldings   4.5       7.5     0.8          30
East Kent Goldings   4.5       0.0    0.75         0
East Kent Goldings   4.5       0.0     0.2     Dry Hop

Yeast
Pitched ~75 mL of thin 1968 London ESB yeast slurry with lots of trub/hop material from starter built up from Buster's Bitter yeast cake

Water
replicated water from previous Ordinary Bitter brew except for keeping the HCO3 at 24 and upping the Cl to ~50 ppm and Na to ~30
Mash Schedule
Single Infusion   60 min ~149-150 (aimed for 152 F), 10 min mashout ~165 F

In mash: 2 mL Lactic Acid; pH ~5.1
In boil: salts to hit water profile

It will be interesting to see how this particular beer comes out without the "double-drop" method of fermentation and how my first time using Marris Otter as a base will result in the finished beer. I'm hoping these changes will result in a beer just as sessionable yet flavorful as the previous Ordinary Bitter. If this particular brew comes out as well as the previous Bitter brew, I think I may have to make Ordinary Bitters a style that I frequently brew. I find myself more and more thinking of brewing sessionable beers, rather than the strong ales I've been more obsessed with previously when homebrewing. Focusing on the style may also offer me a greater chance at learning the intricacies of brewing that are most likely lost when I jump from style to style.
The first runnings of the Ordinary Bitter (left) and the vorlauf (right)

Wednesday, November 9, 2011

#25 Belgian Dubbel (Batch No.2)

The English Ordinary Bitter
After brewing the Belgian Tripel, I wasn't exactly sure I'd try and use the 3787 Trappist High Gravity yeast again. After tasting a few bottles of the Tripel, I was more than happy to brew with this particular yeast again. The Tripel came out incredibly dry (1.006) yet has a rich mouthfeel, sweetness, esters, and phenols. It's by far the best Belgian I've made so I am hoping this Dubbel will demonstrate some of those flavors I love so much in the Tripel but at a more sessionable ABV.

I chose to go with a recipe very close to the one I brewed back in January as my second brew on this blog. It's yet another recipe from The Jamil Show with a few tweaks. CaraBelges was a substitute for Aromatic, CaraAroma a sub for Special B, and Belgian Candi sugar as a sub for the syrup which Jamil apparently considers superior to the rock candi sugar. I still had 4 ounces left from the last Dubbel brew, so I thought I might as well use it up.

Belgian Dubbel (Batch No.2)
The wort collected during the vorlauf

Batch Volume (Gal): 6.0
Pre-Boil Volume (Gal): 6.64

Total Grain (Lbs): 14.25
OG: 1.063 (1.066 after sugar added to fermenter)   
Anticipated FG: ~1.012   Anticipated ABV: ~7.14%

IBUs: 23
SRM: 15.9
Brewhouse Efficiency: 72%
Boil Duration: 95 min

Grain (Lbs/oz.) (%)
Weyerman Pilsner 11 77.2
Munich Malt 1 7.0
CaraBelge 8 oz. 3.5
CaraMunich 45 8 oz. 3.5
CaraAroma 8 oz. 3.5
Cane Sugar 8 oz. 3.5 (added after peak of fermentation)
Dark Candi Sugar 4 oz. 1.8

Hops (AA%) (IBUs) (Oz.) (Boil[min])
Styrian Goldings 4.5 19.3 1 90
Czech Saaz 3.0 3.9 1 20

Yeast
Pitched ~150 mL of thin slurry from Trappist 3787 High Gravity yeast starter. Yeast reharvested from Belgian Tripel

Water 
Ca: 85 Mg: 2 SO4: 19 Na: 15 Cl: 18 HCO3: 154
(targeted Chimay water profile as with the Belgian Tripel)

Mash Schedule
Single Infusion   60 min 149-148 F, 10 min mashout at 165 F; pH ~5.2
In mash: 4 g CaCO3, 4 mL Lactic Acid
In boil: 1 g NaHCO3, 0.5 CaSO4, 0.5 CaCl2

Reading original gravity of the wort before the boil
Overall this brewday went fantastic, and with the weather it was one of the most enjoyable days I've had to brew. My mash numbers were good, something I haven't been able to target very well with the last couple brews, and the other little things went well also. I finally purchased a bottle of oxygen that actually had oxygen in it, which was a nice change as the last two oxygen bottles I had bought were completely empty. It was great to finally have my oxygen system work after the past three brews.

Running off the cooled wort into the fermenter
The one thing I am concerned about was my yeast 3787 yeast starter. When I first propagated this yeast before the Belgian Tripel brew, I did notice that it gives a fairly funky and somewhat off-putting aroma and flavor when growing in a starter. I was concerned initially that that first pitch was already infected, and yet it fermented what I think could be my best Belgian I've ever brewed. So I'm hoping this will be the case with this particular starter. After tasting some of the starter wort and yeast, it seemed to have a bit of a Lactobacillus tartness and flavor. It tasted great, but I'm worried it could be the sign of Lacto infection. After thinking about the possibility of infection, I wasn't too concerned, as I had contemplated souring a portion of a mash for a Belgian with this beer anyway. I think I'll be happy with this beer with or without a small Lacto infection, but I'm hoping that it's nothing that will dominate the beer too much if it is infected.


I'm not sure how many opportunities I'll have to brew until I move, but I am hoping to repropagate the 1968 strain possibly for some other brew, possibly another Bitter as my first batch is disappearing quickly. There's also the chance that I try to brew a lager for the first time in two years seeing as I will finally have a way to control fermentation temperatures (with the fermentation chamber outside using ambient late Fall temperatures to cool fermentation and the FermWrap heating the fermentation). Either way, I'm hoping to fill a few of my kegs and possibly some bottles before I move and no longer have the chance to provide myself with a steady stream of homebrewed beer.

Chilling the boiled wort using the immersion chiller

Wednesday, November 2, 2011

#24 Buster's Bitter (Batch No.2) / Bottling the Belgian Tripel / Baking "Mashed" Bread

The Scottish Wee Heavy
For what will most likely be my last brew with this particular pitch of Wyeast of 1968 London ESB ale yeast, I wanted to brew another batch of a beer I brewed last fall in honor of my grandfather. The beer last year was brewed with the 1968 strain and came out great, so I wanted another chance to brew this beer with a few tweaks.

The malt bill for this beer was formulated to a certain extent out of necessity. I'm planning on making a move soon, and I'm not sure I'll have the chance to brew all-grain batches once I move. There's a fair amount of base grain and a few specialty grains I am looking to use up, so the base came from the remainder of a bag of British 2-row, some American 2-row, and some Carastan malt (aka British Crystal). I liked the influence of American Special Roast Malt so much in the Ordinary Bitter that I chose to put a small amount in this grain bill too. The Carastan, American Special Roast, and Crystal 120 are substitutes for Aromatic Malt, and Crystal 60 that I used in the previous batch. I chose to use the same hops but with a different hopping schedule; I chose not to "pepper" in hops as I had with the previous brew, but keep Northern Brewer as a bitter/flavor hop and let the EKG and Fuggles do all the aroma and dry hopping. The first batch of Buster's Bitter finished with a gravity that was a bit too low for my taste, so I chose to lower the mash temp as well this time around.

Buster's Bitter (Batch No.2)

Batch Volume (Gal): 6.0
Pre-Boil Volume (Gal): 7.0

Total Grain (Lbs): 14.5
OG: 1.065   Anticipated FG: ~1.012   Anticipated ABV: ~7% ABV

IBUs: 46
SRM: 11.3
Brewhouse Efficiency: 74%
Boil Duration: 95 min

Grain                                                  (Lbs/oz.) (%)
Malteurop North American 2-row        7       48.3
Pearl British 2-row                                  5       34.5
Carastan Malt                                           1        6.9
Wheat Malt                                             8 oz.    3.4
Victory Malt                                            8 oz.    3.4
Crystal 120                                              4 oz.    1.7
American Special Roast                         4 oz.    1.7

Hops                      (AA%) (IBU) (Oz.) (Boil[min])
Northern Brewer  12.3      41.3    0.8        90
Northern Brewer  12.3       4.8     0.2        30
EKG                         4.5          0      0.5         0
Fuggles                    4.0          0     0.5          0
EKG                         4.5          0      0.5    Dry Hop
Fuggles                   4.0          0      0.5     Dry Hop

Yeast
Repitched ~115 mL of thick, moderately clean 1968 London ESB yeast slurry from Black Butte Porter yeast cake

Water
Ca: 100 Mg: 2 SO4: 134 Na: 25 Cl: 81 HCO3: 84
Mash Schedule
Single Infusion   5 min 140 F, brought up to 150 F 10 min, brought up to 152 F at 15 min, 
15 min mashout at 165 F 
In Mash: 3 mL of Lactic Acid; pH ~5.4
In Boil: 2 g NaHCO3, 6 g CaSO4, 4 g CaCl2

Transferring the Porter off of the 1968 yeast cake
Only two issues on this particular brew day; my mashing continues to be a bit unpredictable and I can't seem to buy an oxygen tank that has any oxygen left in it. The mash for whatever reason began at 140 F after targeting 152 F. I have no damn clue how it started out this low; I preheated as I always do, calculated out my strike temp but missed my target by 12 degrees. Luckily I brought up the temp quickly with boiling water, but this low initial temp may likely produce a drier than desired English Extra Special Bitter. The mash pH as well continues to be unpredictable, and I consistently hit 5.4 pH at mash temps. Not sure this is a bad thing as I often hit this pH and produce beers, but I've found that when I hit 5.1 or 5.2, my beers are much crisper, acidic, and generally more like a commercial example of the style than if I hit a slightly higher mash pH.

The new thermowell for the temp probe
For the second time it seems I purchased a disposable oxygen tank that was completely empty. I have no damn idea how this keeps happening; the first O2 tank I bought had plenty of oxygen, and I know these tanks are not meant to be refilled, so I have no reason to believe that I needed to have these tanks filled in the first place. For the second brew in a row, I had to resort to an old method of aeration which this week happened to be simply sloshing the beer around in the carboy. Hopefully there was a sufficient amount of oxygen mixed into the wort when it came time to pitch the yeast.

I am hoping that I'll have at least a few more chances to brew all-grain before my move, with either a Belgian Dubbel brew or a Biere de Noel with the Trappist High gravity planned soon. If not, I may have to wait a while before I'll have the chance to brew again, so I'm happy that the last few batches I've brewed are ready to drink just before winter comes.
________________________________________________

Bottling the Belgian Tripel


Sanitizing the Belgian Corks
After about a month in the carboy I was able to bottle the Belgian Tripel in 750 mL cork and cage Belgian beer bottles. After the failure of many of the bottles of Belgian Biere de Garde to carbonate in the Belgian beer bottles with plastic stoppers, I knew that I had to go with Belgian corks if I was to ever bottle a batch of beer in Belgian bottles. Fortunately, the wine corker I have works quite well with these corks (with a few modifications) and I was able to bottle the entire batch in both Belgian Beer bottles and Belgian "Champage" style bottles.

I added about 5 ounces of cane sugar to prime these bottles with which should carbonate the beer to about 3.0 volumes of CO2. The flat beer tasted fantastic, so I can only imagine with some added carbonation and a slightly colder serving temp, this beer will be great for winter.

Baking "Mashed" Bread

Mashing the Specialty Grains with a glass of Murphy the Stout Hearted
I've baked a few batches of spent grain over the past year, but this time around I wanted to experiment with some extra specialty grain I had lying around. I threw together some wheat, crystal 60, carapils, crystal 120, and a lot of chocolate malt and mashed it all for about 20 minutes on the stove, then proofed my bread yeast using the resulting wort from the mash. This all went into the mixing bowl with bread flower and baked. The bread had the exact color of Chocolate malt and the roastiness of the malt comes through a bit with a lot of chocolate malt flavor. The two loaves taste great, and I'd really like to see what some "mashed" bread would taste like if I went with a crystal malt instead.
The "mashed" grain bread dough

Wednesday, October 26, 2011

#23 Black Butte Porter (clone #2)


One of my favorite styles of beer is Porter, and I don't think there's a better time to drink Porter than the fall. Although I'm a bit late with this brew, as it won't be ready until mid November, I'm glad to get to brew a beer style I love so much.

Black Butte has been one of my favorite Porters if not one of my favorite beers since I had a couple with my girlfriend out in Portland, Oregon. Unfortunately due to lack of distribution out to the East Coast, I haven't had it for quite a while and cloning the brew is the only way to come up with a beer that at least begins to compare with such a great beer. I brewed a clone of this beer last fall with the Wyeast 1968 London ESB strain, and it was one of the first beers I think I brewed that I was really happy with. I plowed through the keg with my dad and was sad to see it go then, so I'm hoping this brew will at least match the previous attempt.

The current recipe for this clone came from Can You Brew It? on the Brewing Network. It looks very similar to the recipe I went with last year with only a British Chocolate replacing the Black Patent I used last year. Since I was unable to find this lower Lovibond British Chocolate as described in the recipe, my local homebrew store owner suggested some dehusked black malt to give the color of a Robust Porter without an over the top roast quality to the beer. I really love what dehusked black malt does in a beer so I'm hoping it meshes well with the other specialty grains and hops.
Black Butte Porter


Batch Volume (Gal): 6.0
Pre-Boil Volume (Gal): 6.5

Total Grain (Lbs): 13.79
OG: 1.060   Anticipated FG: ~1.012   
Anticipated ABV: ~6.33%

IBUs: 37.5
SRM: 26.4
Brewhouse Efficiency: 73%
Boil Duration: 95 min

Grain                                                  (Lbs/oz.) (%)
Malteurop North American 2-row    10.6     76.9
Wheat Malt                                            1.4      10.2
Crystal 80                                              0.7        5.1
Cara-Pils Dextrin Malt                       0.42       3.0
Chocolate Malt                                     0.42       3.0
Dehusked Black Malt                          0.25       1.8

Hops                      (AA%) (IBU) (Oz.) (Boil[min])
Galena                     14.1    30.3    0.5         90
Cascade                    6.0     6.0      0.5         30
German Tettnang   3.5     1.1       0.5         5

Yeast
Repitched 100 mL of thick, dry, clean 1968 London ESB yeast slurry from Ordinary Bitter

Water
Ca: 117 Mg: 2 SO4: 42 Na: 27 Cl: 66 HCO3: 183

Mash Schedule
Single Infusion   5 min 150 F (aimed for 154-155 F), raised up to 155 F at 15 min for remaining 45 minutes of mash, 10 minute mashout at ~165 F
In Mash: 4 g CaCO3, 2 g NaHCO3, 5 mL of Lactic Acid; pH ~5.4
  added 5 mL of Lactic Acid at 15 min; pH ~5.2-5.1

Overall the brewday went fairly well. I would have preferred to hit a mash temp of 154-155 F for the entire 60 minute mash and has a pH of 5.1 as well. The low mash temperature may not necessarily result in an overly dry beer; the usage of carapils dextrin malt should provide a bit more dextrin sugar in the finished beer, and the 1968 yeast strain is fairly flocculent resulting in a strain that is a relatively low attenuator. This should leave a little bit more of a body to the finished beer if the yeast fails to eat all the available sugars. I think the beer should turn out fairly crisp however due to the malts, salts added, and the pH of the mash I eventually hit. I was a little worried upon tasting the mash runnings; I could taste lactic acid fairly easily. I think the large additions of CO3 and HCO3 likely buffered the Lactic Acid additions, thus leaving me with the high pH to start with. Hopefully the lactic acid flavor will not be apparent in the finished beer.
The mash after a 10 minute mashout at 165 F
I also failed to watch the sparge close enough and ran off too quickly, but luckily I collected only a bit more wort than I had hoped to collect, a mistake that only increased my targeted OG by three points and decreased my targeted water profile by a few ppms in each ion concentration. I don't think this will have any detrimental effects as I've done this a few times before. 

What I am worried about is the fact that I had no oxygen to aerate my wort with once it came time to ferment the beer. Apparently I was sold a disposable oxygen tank that had no oxygen in it. I'm not sure if it had a leak, was empty when I got it, or what the deal was exactly but there was no oxygen to put into the wort. I had to resort to my method of aeration that I haven't used (for good reason) for the past two years at least of brewing. I aerated using a pyrex dish to splash the wort for about a minute; hopefully this won't result in any infection. In addition to the splashing, as I do with every beer, I also splashed the wort as I transferred from the boil kettle to the fermenter. The most I can hope to have put into the wort is 8 ppm of oxygen, not the amount I usually can with oxygen, but hopefully the yeast are healthy enough to ferment this beer well regardless.

In order to repitch the 1968 yeast strain I had to transfer the Ordinary Bitter into a keg. My goal was to partially imitate cask conditioning of this particular beer, so I added about three ounces of priming sugar during the transfer. The 1968 yeast was such a strong flocculator however, that I was worried there would be too little yeast to naturally carbonate the beer in the keg. I added a few mL of yeast from the bottom of the fermenter to ensure I could produce the necessary secondary fermentation. I'm really excited for this beer to condition and carbonate soon as I think it'll make for a great session beer, just in time for some colder weather.

Monday, October 17, 2011

#22 Ordinary Bitter


It's been a long wait for the Belgian Tripel to finish fermentation, and now that it's finally wrapping up activity, I was able to start the new strain of Wyeast 1968 London ESB yeast in an Ordinary Bitter. With all the additional sugar added and the high gravity of the Tripel, it took a while for me to see activity slow and was hesitant to take the beer out of the fermentation chamber too early. I think I'll let it settle out at basement temperatures and bottle it when I get a chance in 750 mL cork and cage bottles while saving the Trappist High Gravity strain for either a Dubbel or Dark Strong/Quad brew later this fall.

The Krausen on top of the Ordinary Bitter
after about 16 hours
Out of the yeast strains that I have used so far in my brewing, the 1968 London ESB strain is by far my favorite. If there was one strain I had to select as my "house" strain, the 1968 would be the one I would go with. I used it last fall to brew a Porter (Deschutes Black Butte clone) and a strong ESB. Both came out fantastic with a slighly sweet finish, very silky, malty, nice fruit flavors, and just overall great beers for fall and winter drinking. This time around I want to use the strain as much as possible, and I'm hoping to step this strain up starting with the low gravity Ordinary Bitter, then progressing to a Porter, and finishing with the same strong ESB recipe I created last year.

"Double-dropping" the Ordinary Bitter
into a second fermenter
Last summer I brewed an Ordinary Bitter with the Thames Valley strain and after hearing about the "Double-Drop" method of fermentation used by the brewers at Brakespear for their Ordinary Bitter, I chose to do the same. Although I made the beer undrinkable with an overzealous addition of gypsum salt, I could taste a nice, unique, and what I thought to be English fruit and malt character in the beer. This could be due to the yeast alone, but I'd like to see what the double drop does to this year's Ordinary Bitter. The beer's been at about 66-67 F overnight and has formed about an inch of Krausen. After "droping" the beer into another fermenting bucket, the beer and active yeast were able to separate from any trub that made it into the fermenter from the boil kettle. I splashed the first gallon of the wort coming from the fermenter into the bottom of the new fermenting bucket, adding additional oxygen into the wort to allow for a unique fermentation. The theory is that adding additional oxygen after fermentation has begun will allow for additional growth of yeast, additional ester production and thus those fruity flavors, and will put yeast cells on different cycles of aerobic metabolism, anaerobic fermentation, and conditioning. I'm hoping this yeast responds well to this process and if not, I'll likely give this beer another shot either before or after brewing up the Porter.

I also plan on trying to serve this beer in a way at least partially resembling a traditional English cask. I'll transfer to the keg, with priming sugar (and hopefully some finings if I can get some before that time), allow that to carbonate and condition, and either serve with a small amount of CO2 at my basement temperature, or serve from the kegerator at slightly colder temps.

Ordinary Bitter

Batch Volume (Gal): 6.0
Pre-Boil Volume (Gal): collected 4.0 of wort, 
     topped up to 6.0 before boil

Total Grain (Lbs): 8.34
OG: 1.036   Anticipated FG: ~1.009   Anticipated ABV: ~3.54%

IBUs: 32.9
SRM: 13.6
Brewhouse Efficiency: 70%
Boil Duration: 95 min

Grain                             (Lbs/oz.) (%)
Pearl (British) 2-row         7        84.0
Crystal 120                       15 oz.    11.5
Special Roast Malt           6 oz.     4.5

Hops                          (AA%) (IBU) (Oz.) (Boil[min])
East Kent Goldings   4.5      25.4    1.25         90
East Kent Goldings   4.5       7.5      0.8         30
East Kent Goldings   4.5        0      0.75          0

Yeast
Pitched Wyeast Activator packet of 1968 London ESB yeast directly into wort

Water
Ca: 100 Mg: 2 SO4: 205 Na: 10 Cl: 29 HCO3: 45
Mash Schedule
Single Infusion   60 min 150 F (aimed for 152-153 F), 10 min mashout at 165 F
In Mash: 5 g CaSO4, 0.5 g NaHCO3, 1 mL Lactic Acid; pH ~5.1-5.2
In Boil: 3 g CaSO4, 1 g CaCl2

Relative to my experience brewing the Tripel, this brewday went great. The only number that I had hoped to hit but failed to was my mash temp. I'm not sure this will be a huge issue for the final beer since there are many variables that could have produced a more dextrinous beer even before I had a lower mash temp, so I'll just have to see how this beer ferments out. I also could have done with a bit more yeast (1.2 packets of yeast or made a starter instead of just pitching one) but I'm sure this beer will ferment fine with the yeast I added. If anything it'll make for a beer that is a bit fruitier and finishes a bit higher, which with my lower than desired mash temp, could be a good thing.
The new "hands-off" grain mill setup
After a few brews with plenty of frustration due to my grain mill, I think I've finally found a happy medium between wet and dry milling. I realized that I have been using a bit too much water to condition my malt before milling and that has just turned my malt into dough on the rollers, causing them to bind up and in essence creating mush instead of grist. I only used about 100 mL of water for this particular grain bill (the suggested rate is about 100 mL per 11 lbs of grain) and it worked beautifully. With some additional time for the grain husks to absorb the water I sprayed before milling, the grist was crushed very easily without having to stop halfway through milling and without any dough buildup on the rollers. The grist looked just as great as it has when I've wet milled properly as well; very pillowy with the majority of grain husks left intact and the starch ground into both large and smaller particles. Hopefully this wet milling process will work with some future brews as wet milling is something I'd really like to continue using as part of my brewing process.

Once this Ordinary Bitter ferments (hopefully within the week) I plan on brewing a Porter with the 1968 strain and then possibly continuing the Trappist High Gravity strain with another strong Belgian ale. It'll be good to have another beer on tap (or "cask") as my supplies of homebrew are dwindling and I need a sessionable beer before football season is over.

Tuesday, October 4, 2011

Fermentation Control Upgrade

The Ranco two-stage controller holding the Belgian Tripel fermentation at 69 F
The fermentation chamber has done a fantastic job of holding the proper fermentation temperatures for the past few brews, however I realized that sooner or later, I would need a controller and a method of heating the ferment if I hoped to get the process of fermentation under the control I have hoped for.

The AC unit so far has been great at holding fermentation temperatures steady. Depending on where the beer is in the process of fermentation, I would simply let the analog thermostat of the AC unit cool the chamber to a few degrees below my targeted fermentation temperature. The cooling of the AC would equilibrate with the heat produced by the yeast during fermentation, and result in a constant temperature. This process worked well, but necessitated frequent checking of the beer's temperature, which could only be viewed by opening up the chamber and looking at the temperature strip on the side of the carboy (in the process, releasing the cold air from the chamber). 

The AC unit was also made more inefficient by the fact that without a controller, there was no way of having the unit turn on only when needed. The unit was constantly running and was more often than not simply circulating air inside the chamber with the fan inside the unit. Rarely would the AC unit kick on to cool the fermentation. It was obvious that much of the time the AC unit was on it was simply wasting energy.

The most significant concern I've had with respect to the fermentation chamber was that as the weather has gotten colder, the need for cooling has decreased while the need for heating has increased. The chamber has been doing a decent job of insulating the beer from these colder temperatures, but I'm sure that soon the heat created by fermentation will not be enough to heat the inside of the chamber.
After doing a bit of searching, I found a great fermentation control system on MoreBeer.com. The controller is a Ranco digital two-stage controller which allows either two cooling units, two heating units, or my current arrangement, one heating and one cooling unit to be turned on and off according to the temperature of the fermentation. I currently have the probe taped to the side of the fermenter and insulated with some cloth, but I think it's registering a slightly lower temperature than the actual fermentation temp. 

Along with the controller purchase, I also bought a thermowell that will solve this issue. The thermowell is a stainless tube just wide enough to hold the temperature probe of the controller. The thermowell will be immersed in the center of the fermenting beer and offer a more accurate temperature reading. The difference between the exterior fermentation temp (as I have been reading it from the fermentation strip on the oustide wall of the carboy since I began brewing) and the internal temp of the fermenting beer will be very small since the volume of fermenting beer is fairly low, but I'm anal and this should offer me the best temperature reading I can get.

The probe (grey cord) measuring ferment temp, the FermWrap (black cords) heating the ferment
The piece of equipment I chose to heat the fermentation is the FermWrap. The wires of the FermWrap split into a grid of coils in a plastic sheet, much like the way in which a window defroster for the back window of a car works. The plastic sheet wraps about 3/4 of the way around the carboy and allows for heating directly to the side of the carboy. So far it appears that it is a quick and efficient method of heating the ferment. The only time I have seen either the AC or FermWrap turn on (other than when I am stepping up temp on the controller) the FermWrap came on for a few minutes to heat the ferment back up one degree and quickly shut off after. Overall I am ecstatic with this particular purchase; I think it is likely the most valuable brewing equipment purchase I have made. It should allow for brewing of any ale style I can think of, and with some tinkering I have planned in the future on the AC unit, it could even allow for me to begin brewing lagers in cooler months. The thought of a Baltic Porter or DoppleBock during the winter has me excited to see if I can achieve lagering temperatures with my new fermentation chamber setup.